
2007 BMW Alpina B7
I purchased this 2007 BMW Alpina B7 in April 2020. It has always been in San Diego, has a clean title and ~73K mi. I am the 3rd owner.
I removed the supercharger cover for the pic below... more about this supercharger later (it's brand new)...

This car is equipped with every available option. Here's the window sticker...

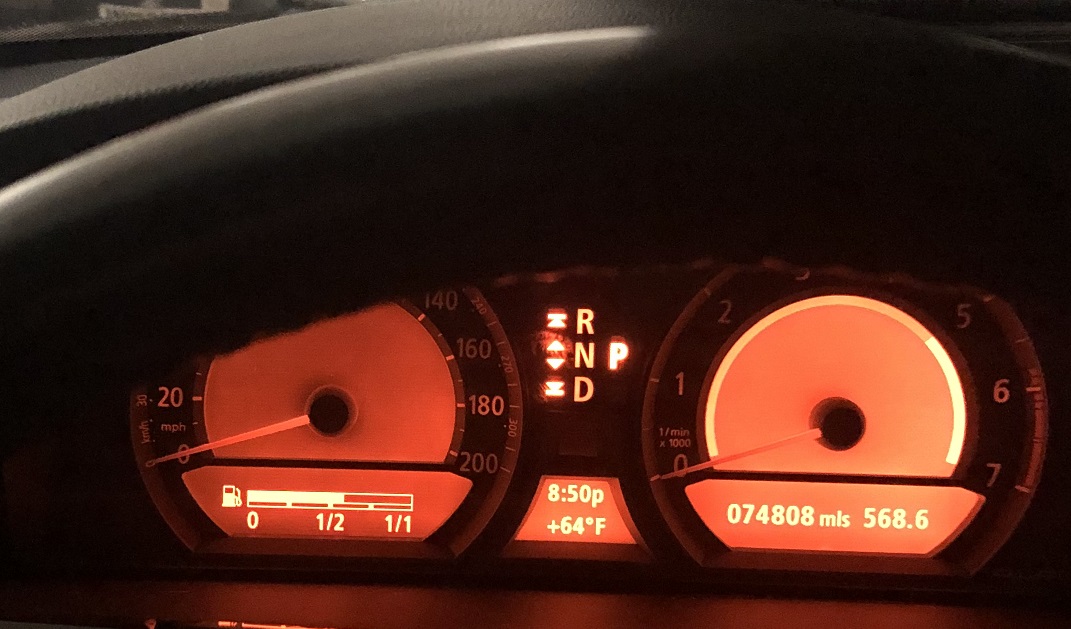
And just over 73K miles.

The Alpina user manuals...

The car came with full service records which I have catalogued below... all typical stuff for a BMW E65.
Not surprisingly, some of the dealer prices are outrageous such as $863 for spark plugs and $860 ea for window regulators! As is often the case with BMW ownership, the previous owner became tired of sinking money into this car.
The underside of this car is completely dry which was a bit of a surprise! Most BMW's of this vintage leak oil if not properly maintained. The alternator bracket seal which often leaks has already been replaced.
This car averaged ~ 9K mi/yr initially but in the last 3 or 4 years before I purchased it had seen very little use (and I've driven it even less in the 5 years I have owned it)!
| Date | Milage | Work performed | Invoice | Cost |
| 4/30/2007 | 0 | Vehicle delivery to 1st owner (no records avail) | here | |
| 6/17/2007 | 2960 | Title issued | carfax | |
| 1/3/2008 | 6932 | Dealer inventory | carfax | |
| 3/25/2008 | 7044 | Vehicle serviced | carfax | |
| 7/7/2008 | 12111 | Vehicle serviced, sunroof serviced. | carfax | |
| 8/25/2008 | 13059 |
Windshield replaced Steering column repaired |
carfax | |
| 1/19/2009 | 16752 | Oil + filter. Brake flush. | carfax | |
| 8/14/2009 | 23049 |
Rear brakes serviced New air filter Oil and filter |
carfax | |
| 8/28/2009 | 23541 | Vehicle serviced. | carfax | |
| 6/10/2010 | 30271 | Courtesy inspection (2nd owner) | carfax | |
| 2/5/2011 | 35543 | engine oil change, diff oil, brake flush, repl micro filter, eng air filter, fix glovebox button. | $0.00 | |
| 3/15/2012 | 46023 |
Replaced front active sway bar (leaking) Front tension struts replaced Brake booster line recall. |
$0.00 | |
| 3/15/2012 | 46023 | New tires (Pirellis) + alignment. | $1,961.00 | |
| 5/13/2012 | 52046 | Passed vehicle inspection | carfax |
n/a |
| 12/3/2012 | 50084 | Oil and filter. Front marker light. | $220.00 | |
| 7/23/2014 | 56154 |
Oil and filter ($192) Microfilters ($166.54) Brake flush ($151.47) Front brake rotors/pads/sensor ($1003.95) |
$1,535.64 | |
| 12/15/2014 | 56785 | Replaced DTML pump | $634.79 | |
| 4/23/2015 | 59153 | Passed vehicle inspection |
carfax |
n/a |
| 5/29/2015 | 59358 |
2 rear tires + alignment ($1083.00) Right rear window reg ($860.66) Right rear window motor ($166.70) Left front window reg + motor ($836.72) Register new battery |
$3,209.08 | |
| 5/16/2016 | 66895 |
Replace spark plugs ($862.88) Replaced drive belts (444.51) Replaced wiper inserts ($48.22) Oil + filter ($99.95) 2 front tires (748.16) |
$2,371.08 | |
| 12/13/2016 | 70891 | Front bumper cover replaced and painted (insurance claim) | $3,984.00 | |
| 12/27/2017 | 71638 | Passed vehicle inspection |
n/a |
|
| 1/16/2018 | 71552 |
Serpentine belt Alternator bracket gasket upper timing cover gasket Throttle body gasket Alternator ($837.72) Oil cooler ($856.49) Micro filters ASA rebuilt super charger ($4317.49) PDC repair Brake flush Engine oil and filter |
$9,432.58 | |
| 6/11/2019 | 72809 | Passed vehicle inspection | here |
n/a |
| 11/27/2019 | 73025 | Intake boot repaired | here | $119.00 |
| 3/24/2020 | 73100 |
Oil and filter New AGM battery Yaw sensor |
$1,111.86 | |
| Total | $24,579.03 |
Supercharger
This car was fitted with a brand new ASA supercharger (DOM 04/2017) that has equivalent performance to the OEM part.
The supercharger was replaced 2yrs before I purchased the car (and just 2,000 miles ) at a cost of $4,300 . The work was done by a local independent BMW shop. I spoke with the shop owner who did not have nice things to say about the stock Alpina supercharger (no replacement parts available).
ASA is the manufacturer of the stock B7 supercharger but that design is custom for Alpina. They will not supply parts for it and BMW has made few OEM spare parts available. There are specialty shops offering seal kits and bearings for the stock unit... I'm not entirely sure why this wasn't an option for this car. The seller indicated the supercharger became noisy (bearings most likely) and dealer wanted over $15K to fix it!


To mount this supercharger a custom CNC machined bracket was made. The oil lines are now by hose vs. the original part which routes them through the mounting bracket. It's all nicely done.


Cooling
The cooling setup does not use a convention fan clutch/fan mounted to the water pump pulley.
The B7 has a single electric radiator fan on the inside of the radiator... the stack-up is AC condenser, radiator, intercooler. The PS cooler is visible in the pic below (front bottom). There is also a transmission cooler (radiator) above the main radiator and an engine oil cooler below the radiator.

The engine oil cooler is mounted below the main radiators. You can see the slots that route air through it in pic below... air exits out the bottom and for this reason the cover under the engine is unique to the B7. There are a lot of unique (to the B7) and expensive plastic parts in the front of this car!

Navigation display 5/24/2020
The plastic window on the navigation screen was damaged (I don't know how). Fortunately I had a replacement on hand from the junk yard.
The BMW service manual says you must remove the wood dash trim to get this out but it is just possible without... but you have to unplug it before removal which is a bit fiddly (reach in behind it). Pull fuse 5 (in glove box) to disconnect power from this module first.

To avoid any need for re-coding, I dismantled the display assy and swapped over just the plastic housing and LCD panel.
Pic below shows all the pieces...the main electronics module on right was not changed.
On the left is the LCD panel which just drops into the housing. A plastic cover holds it in place and also secures the backlight driver (lower module).
A flex PCB assy interconnects everything.


Sunroof seal (5/25/2020)
The sunroof seal is a self adhesive foam strip that runs around the inside of the sunroof opening. It hardens and loosens it shape with age resulting in wind noise.

After peeling off the old seal you are left with this adhesive foam...

The best way I've found to remove it is to slowly roll it off with your thumb... it takes a while and it's tough on your fingers if you are not used to wrenching!

It took me an hour or so to clean off the residual glue and foam. I then removed any remaining glue with Goof off, cleaned the surface with rubbing compound and then a final wipe down with Alcohol. This ensures a clean and oil free surface for the new seal to adhere to.
Roll the new gasket out from the rear center (there is a small dimple in the metal that indicates where to start). You have to feed it into the corners to ensure you don't stretch it out. I've done a couple of these now and each time I was left with almost exactly 6" of gasket material left over.
Finally you need to reset the sunroof... press and hold the sunroof button for about 30 seconds.
I also made some small adjustments to the glass positioning as it was sitting a bit low at the front (3 screws each side of sunroof glass accessible from inside the car). Its now nice and flush with the roof panel.

Adding a convenient hook up for a trickle charger
My cars don't get driven very much so I connect a trickle charger when not in use. Lifting the hood to clip on to the battery terminal is a hassle so I ran some wires out the front.
I use an in-line fuse where I connect to the charging post just incase anything goes wrong. I drilled a small hole in the charging post and used a #6 nut and bolt to secure a terminal lug with the charge wire (red wire in pic below).


The charger connects at the lower front. The connector tucks away when not in use and is barely noticeable..

Harbor Freight had this trickle charger on sale for about $25. I like it because it has a mode for AGM batteries (which this car has) and works great.

Replacement wheel emblems
The wheel emblems were looking a bit tatty (right). You can buy replacements from Alpina but they are not cheap! I got these Chinese knock-offs on Ebay for about $2 ea!
They are not exactly the same and may not last as long but for $2 ea they look pretty good!

To get the old ones off I drilled a small hole and then worked a set of wire cutters in there. Slowly peel and cut it off.

The replacement emblems have an adhesive back but I glued them in with adhesive sealant. I also lightly sanded the perimeter of the new emblems as they are just ever so slightly too big.

After a bit of work they look good as new!

And mounted on the wheel...

Transmission Service
This was preventative maintenance but I could see some oil residue around the mechatronics sleeve and if left unattended this could cause issues.
First job is to loosen the fill plug (to be sure you can refill it) then drain the fluid. Keep all the old fluid so you have a good idea how much to add... I recovered exactly 2 Gal of transmission fluid from the oil pan and valve body. And then flushed about 3 additional quarts from the torque converter/transmission cooler.
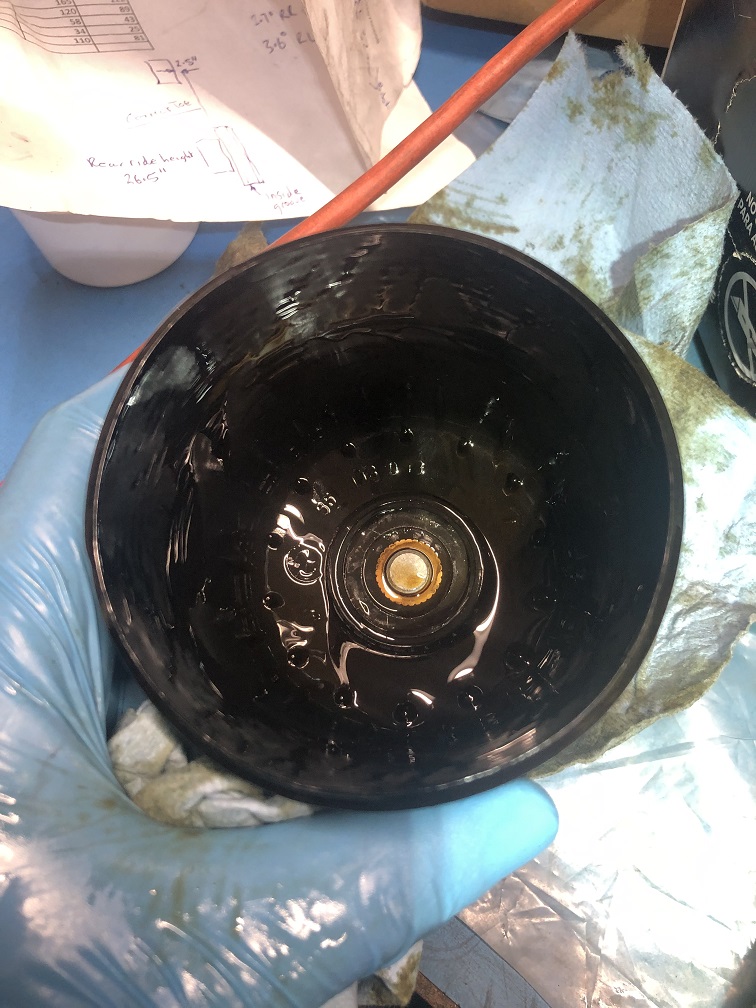
The transmission oil pan is a casting on the B7...
I was very please to see very little residue on the magnets and old fluid and pan look very clean.

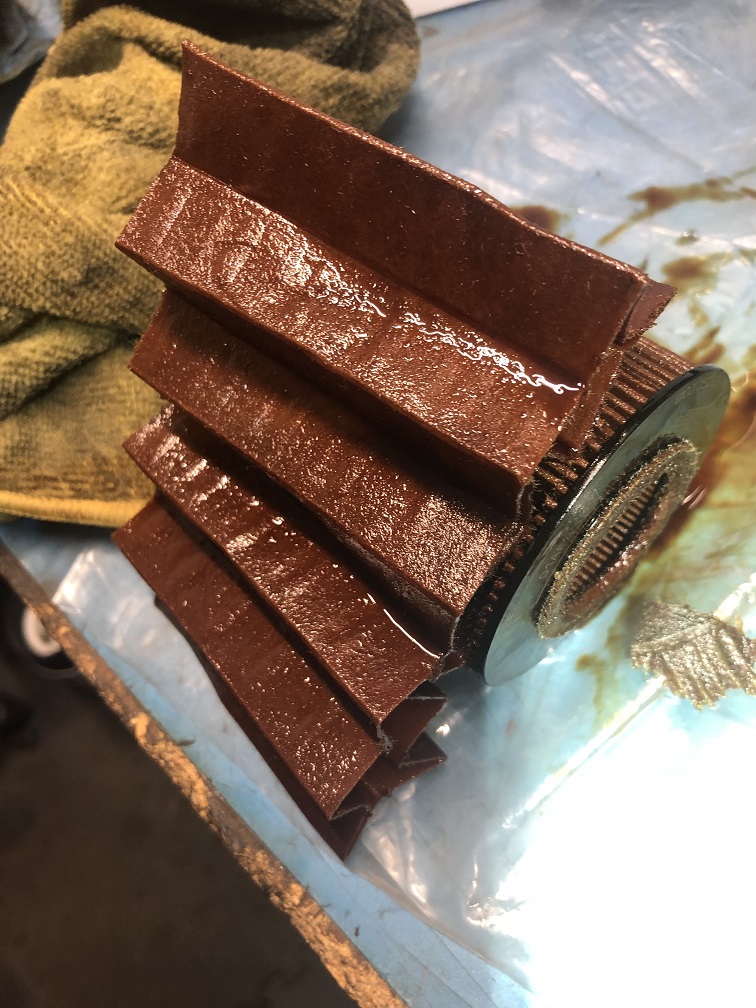
You can then remove the oil filter (just pull). This one is dated 2006 so this is clearly the first time it has been changed.

Then disconnect the transmission electrical connector, release the white locking lever and pop out the mechatronics sleeve (which in my case came out with almost no resistance... no wonder it was leaking).
Release and lower the valve body to replace the bridge seals (I used a Harbor Freight transmission jack to make this easier).

The bridge seals are retained in the transmission body...
I use a pick and needle nose pliers to remove the 4 rubber tubes.

Here are the replacement seals (mechatronics sleeve not shown)..

These are the old (removed) parts.

I drained almost exactly 2 Gal of fluid from the transmission. To refill most of it I used a pvc tube from the fill hole fed up to the engine compartment. I added tape around this pipe where it enters the transmission to ensure a tight seal there. For the final fill I used a small hand pump.


I also separated the return hose from the transmission cooler. Start the engine and pumped a few quarts of fluid until fresh fluid emerged.
New hydraulic trunk struts
Although the trunk opened and closed just fine, it was clear the trunk struts were losing their charge... the trunk lid would drop the last 1/4 or so of its travel when closing. With new struts installed the trunk opens and closes in a very controlled manner with minimal stress on the hydraulic actuator. The hydraulic actuator was leaking on my 760i but on this car it is not so I only need to replace the struts.
First you have to remove the trunk mat, linings on each side and plastic piece surrounding the trunk latch.
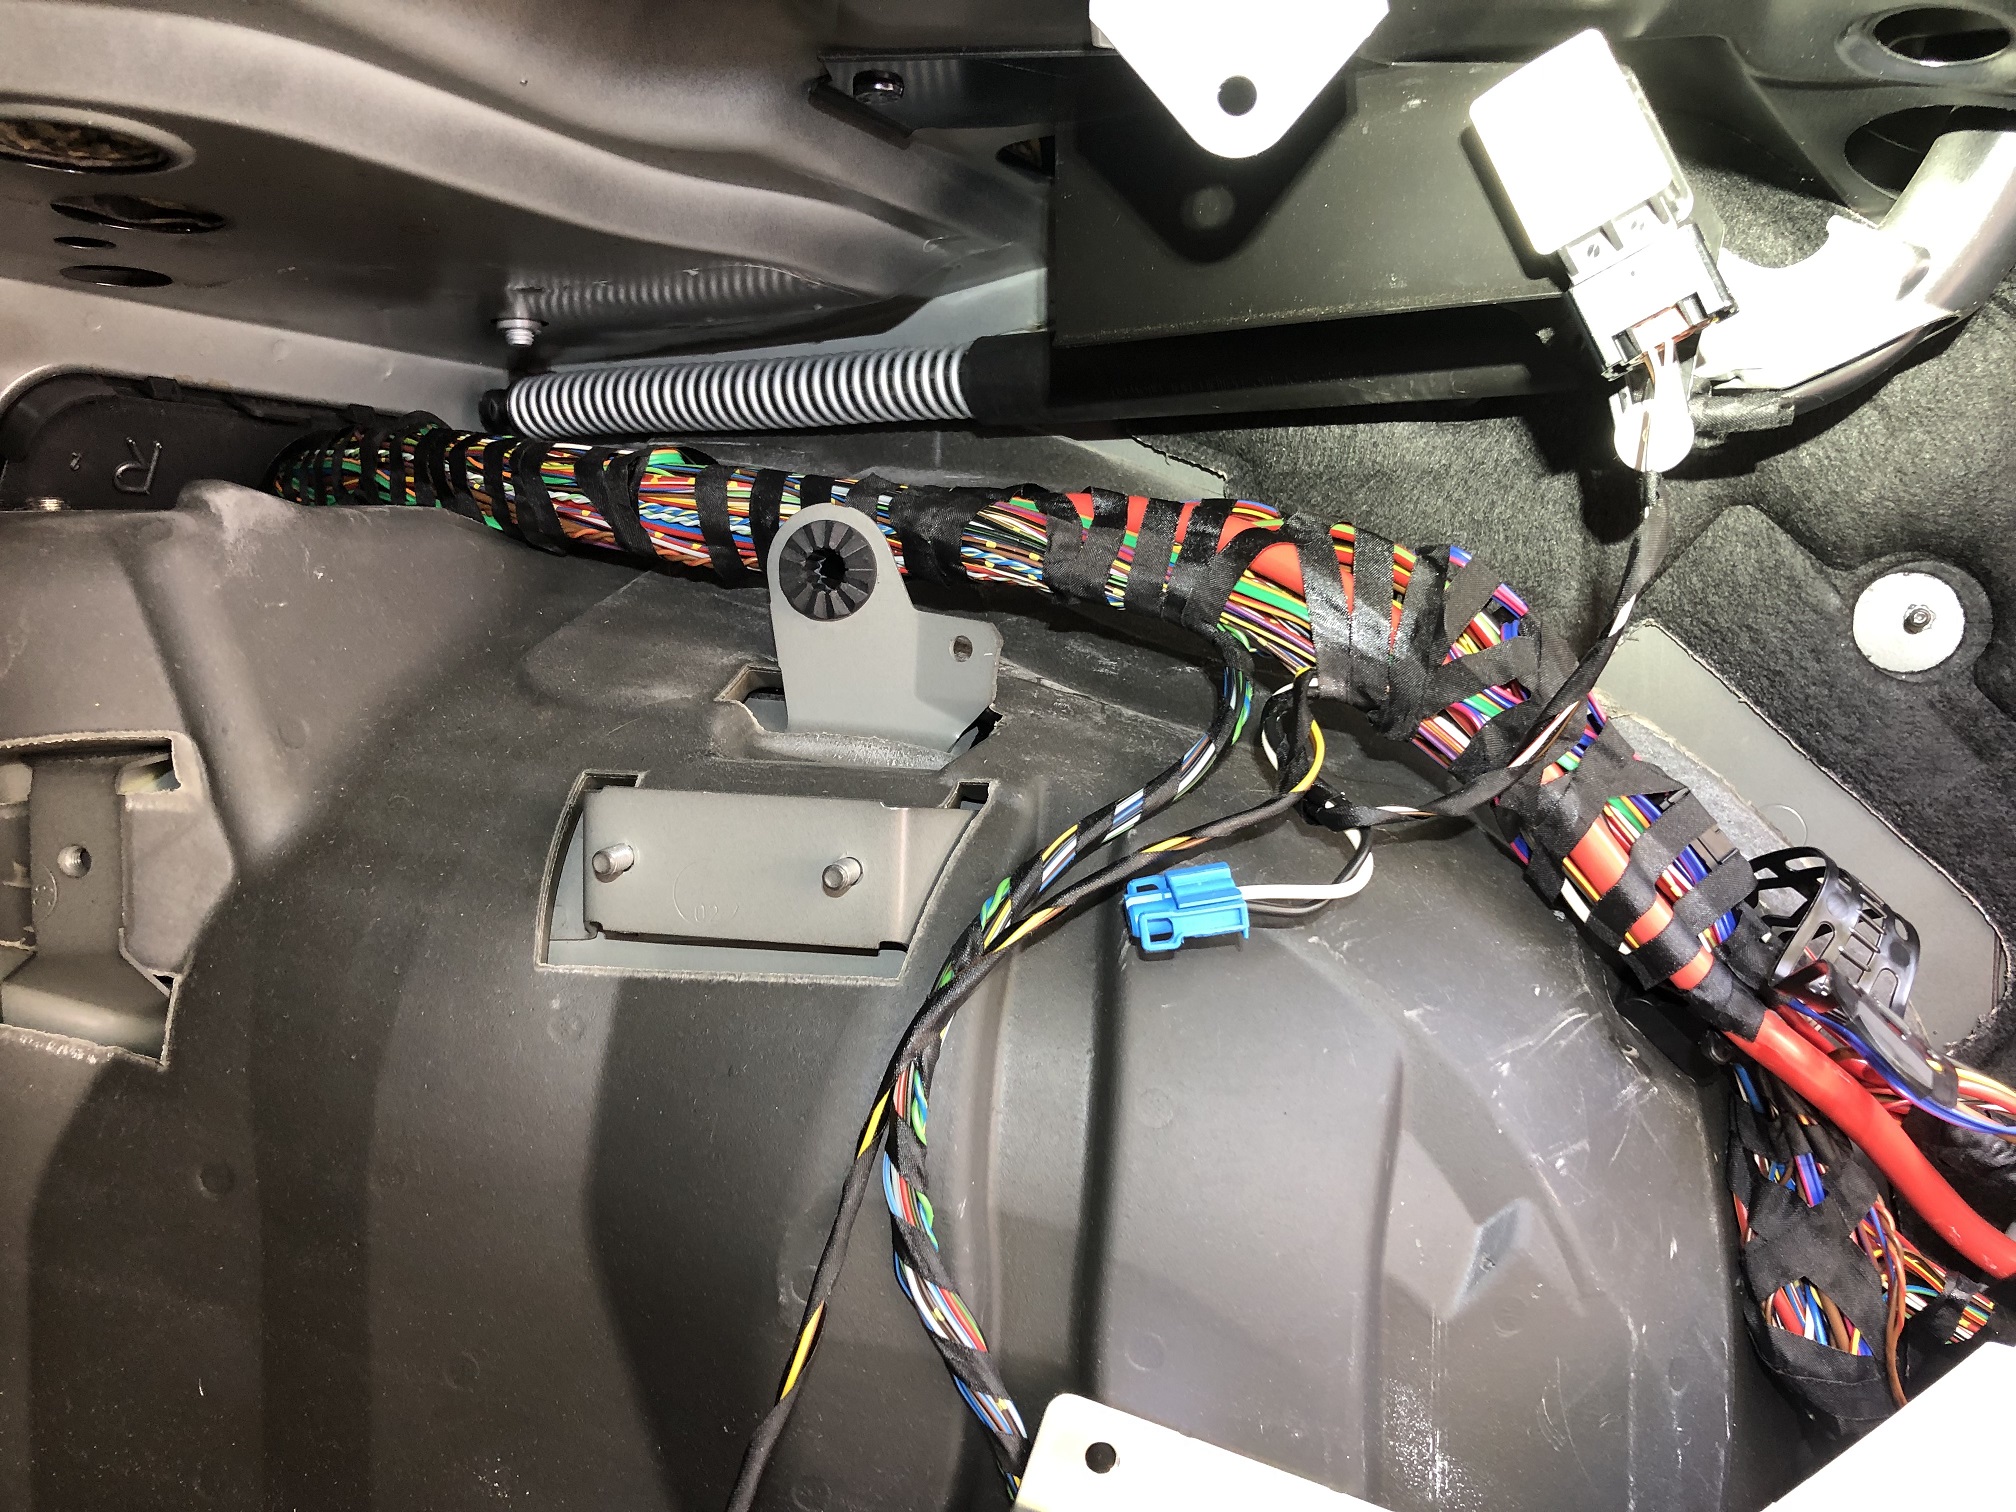
On the right side you have to unbolt the trunk actuator pump, a plastic drip tray and the trunk actuator ECU (held in place with a single 10mm nylon nut).
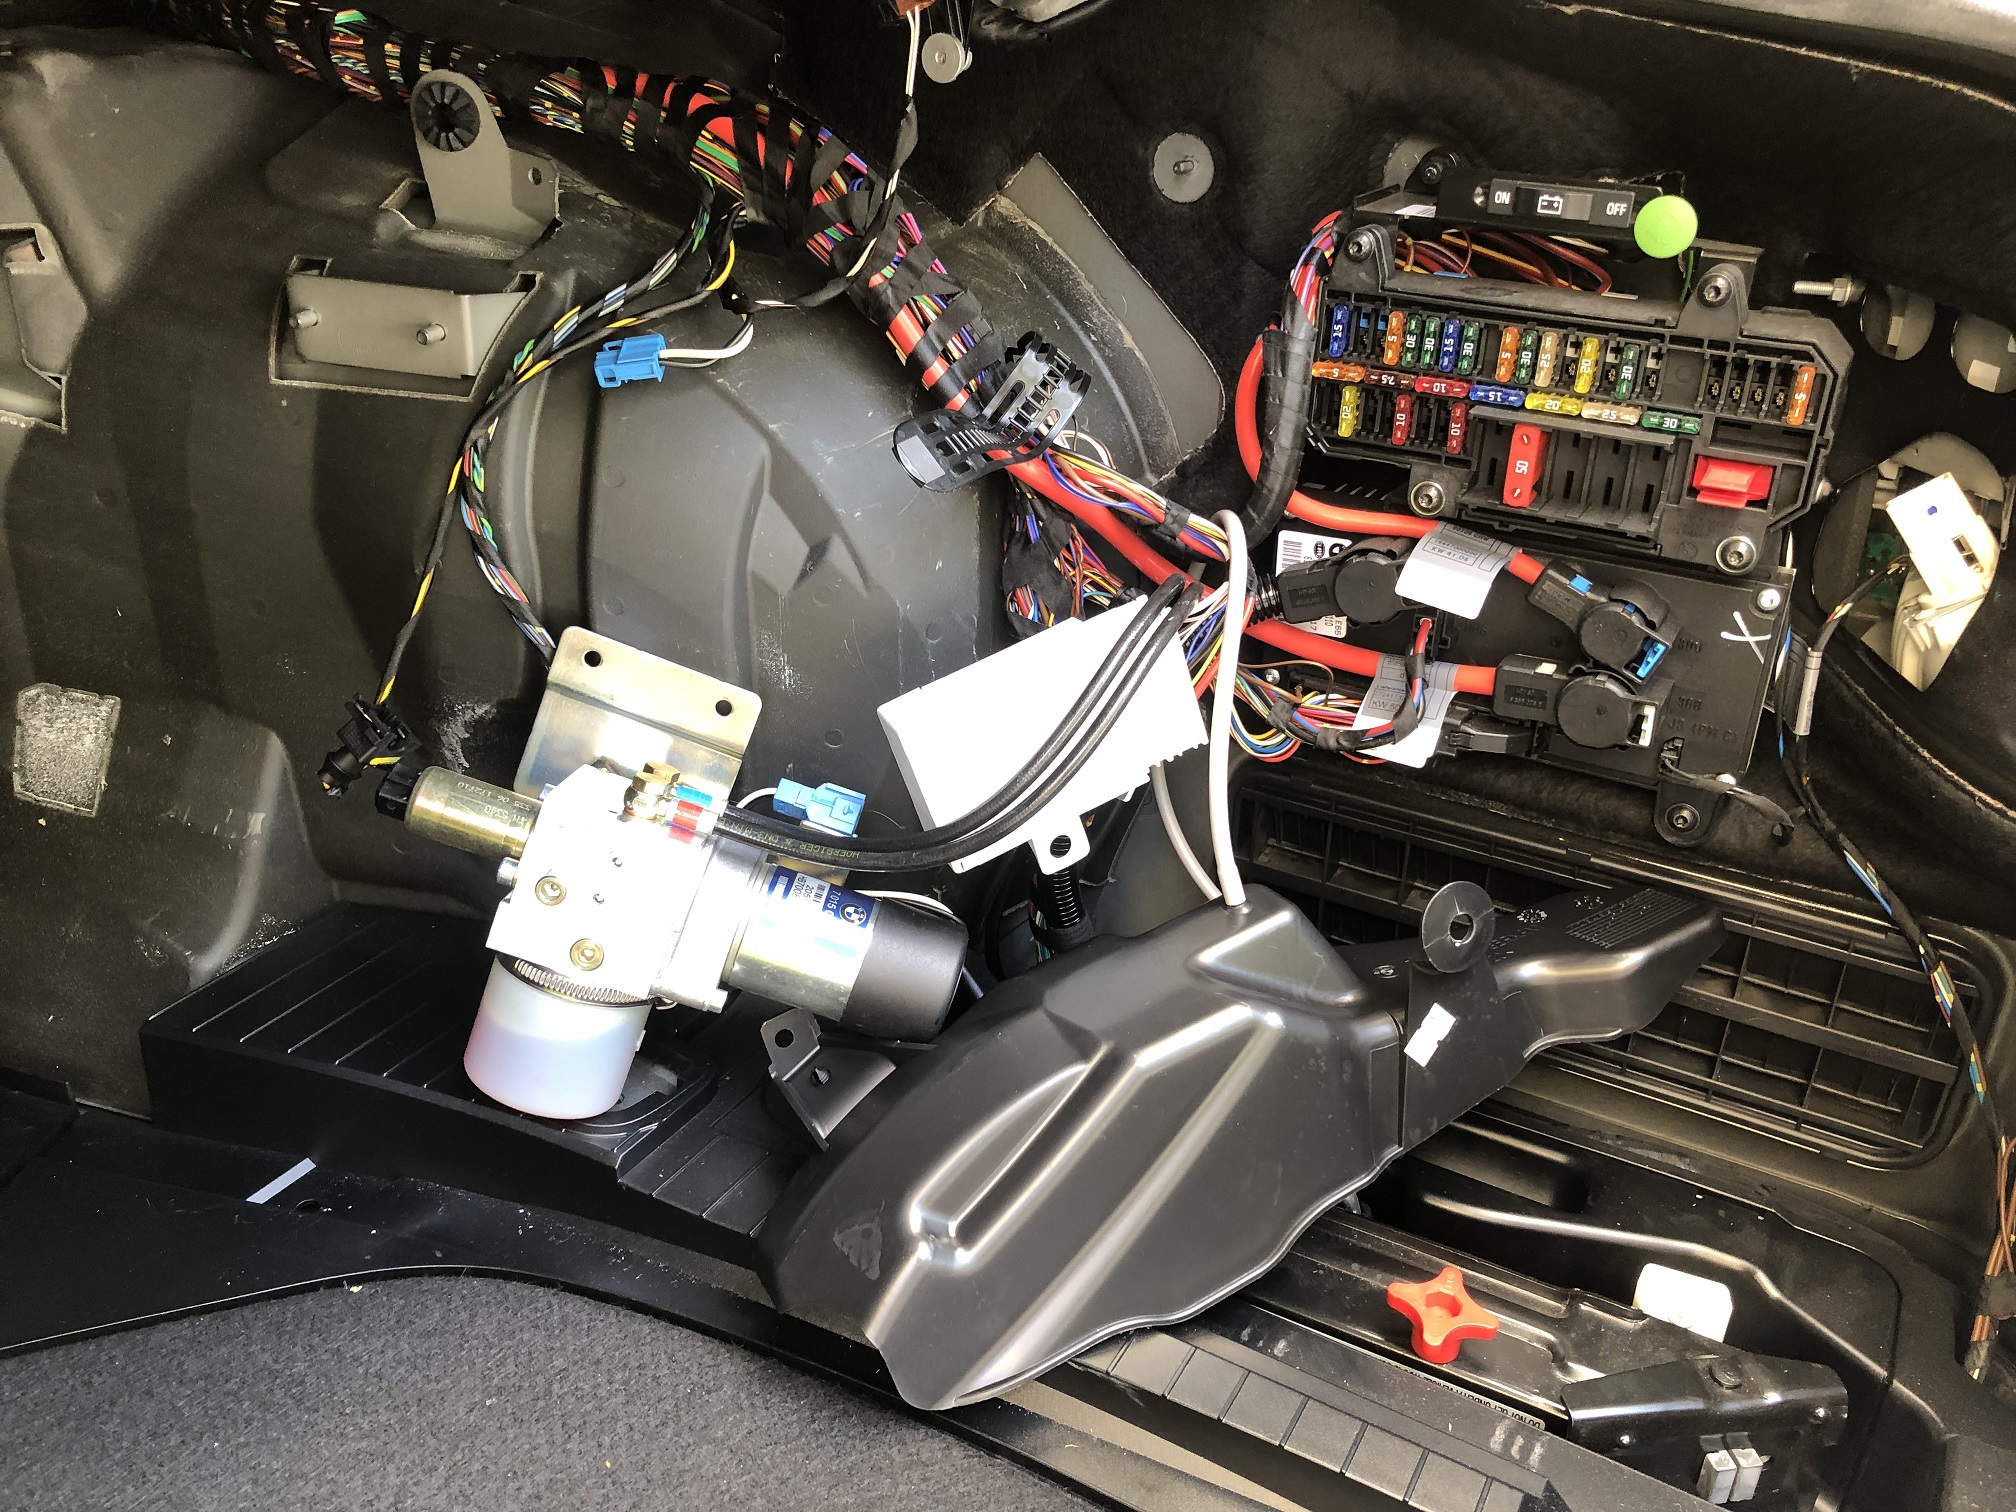
With those out the way you can get to the right side strut.
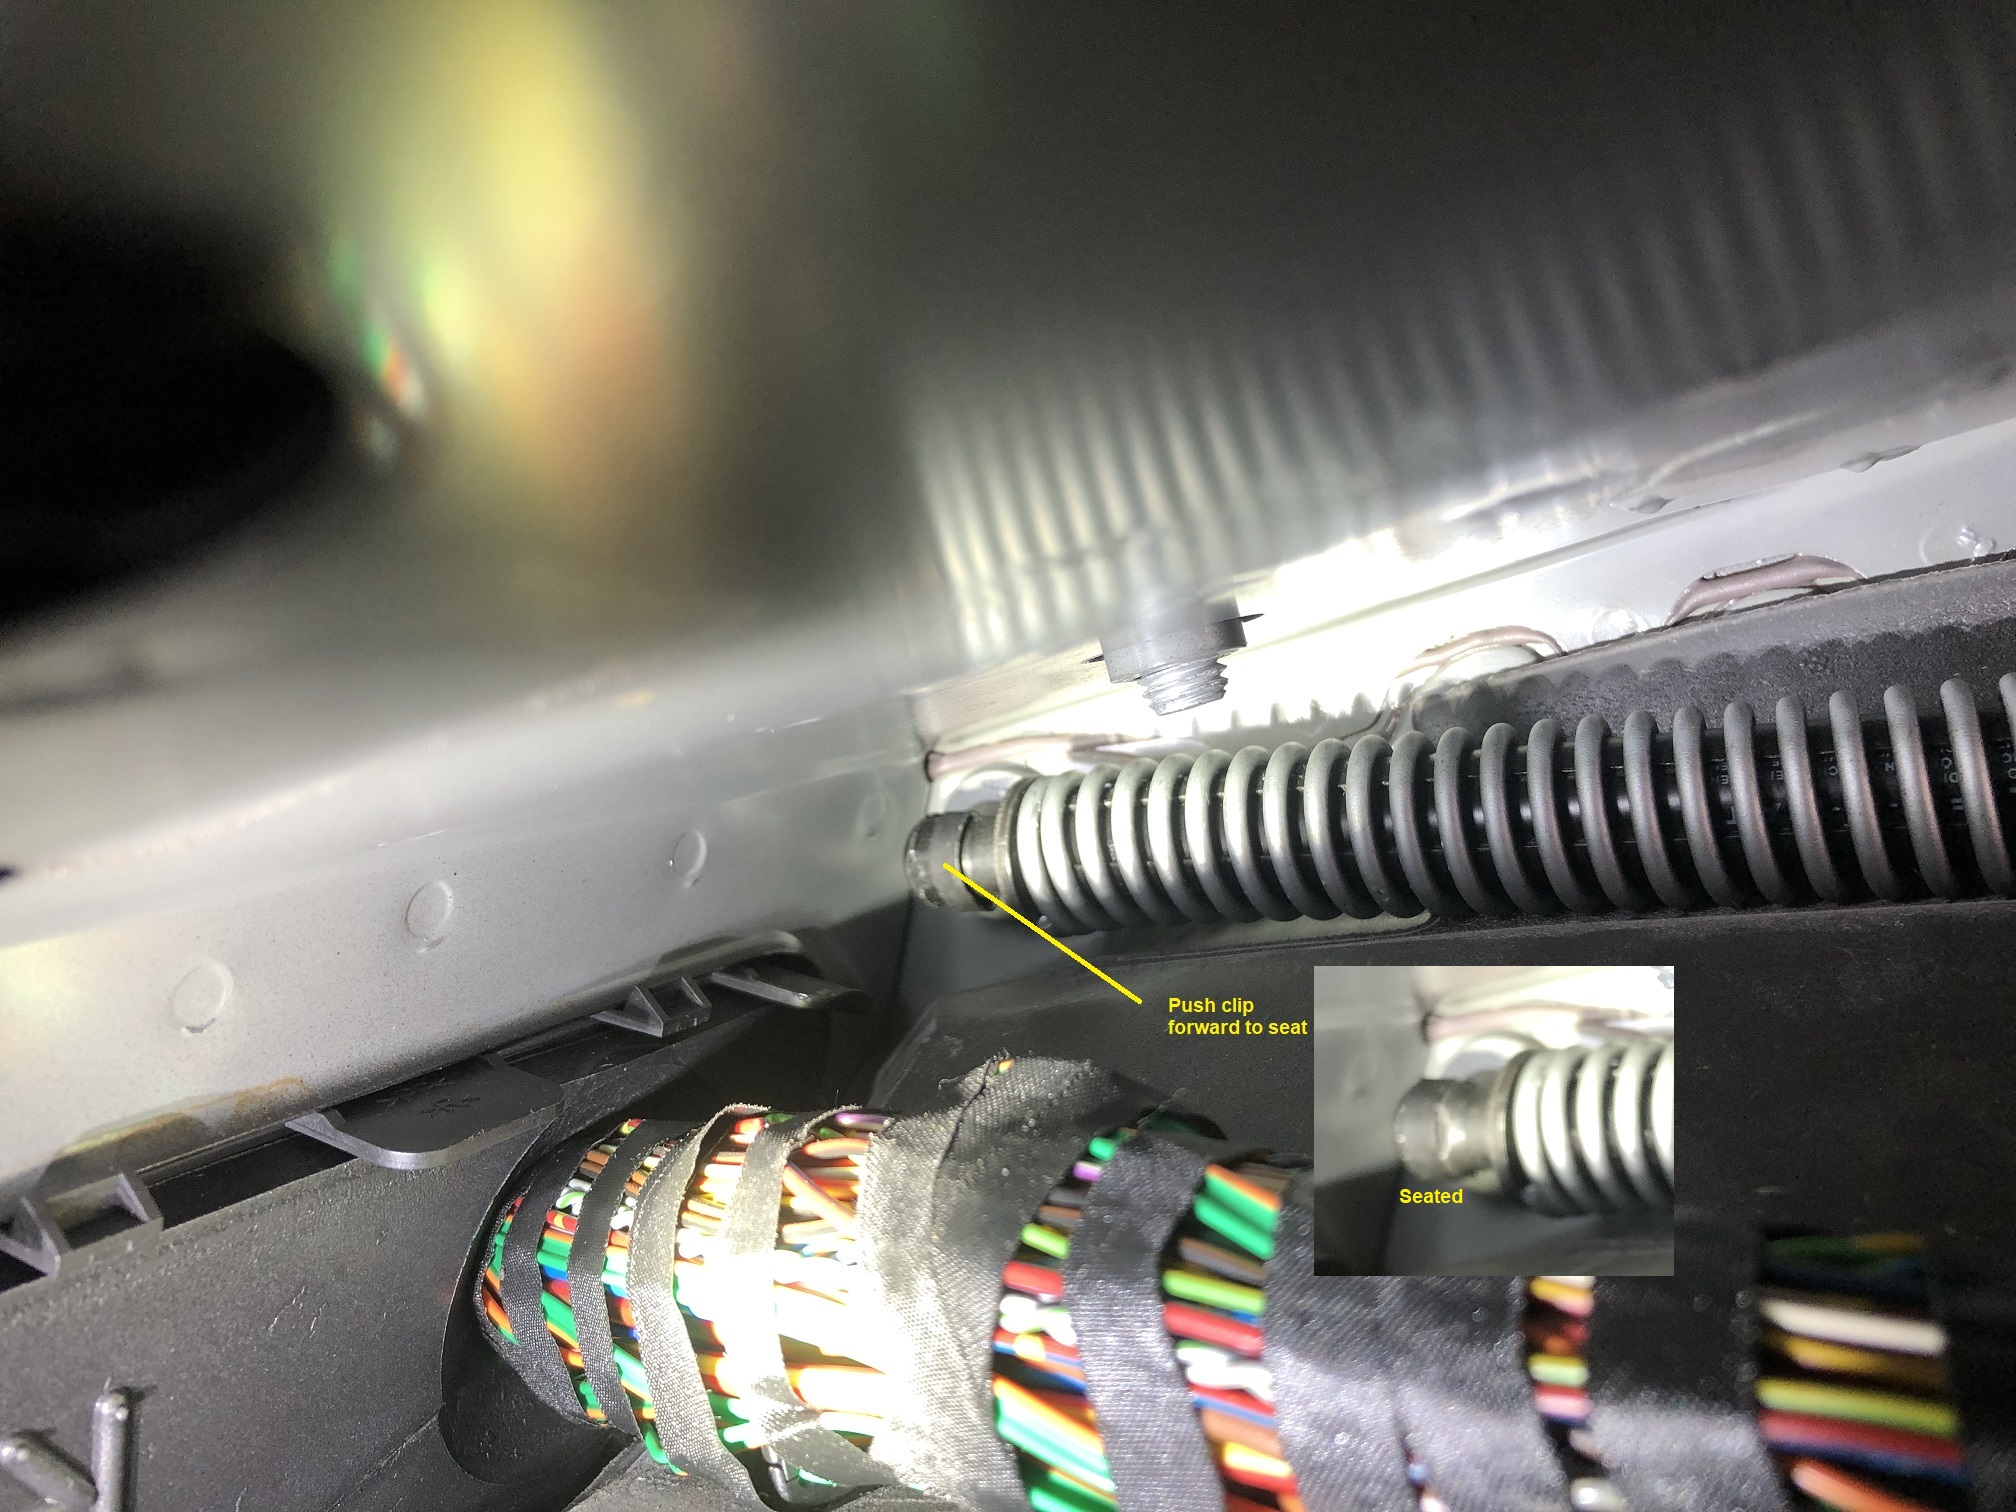
Although they just snap in place (just like the hood struts), its hard to get a good drip on them at the rear so I pushed the little retainer clip forward and then easily able to pop it out.
To reinstall the new one I positioned the retainer clip as shown and then slid it forward once I has the strut in position.
The other end that attaches to the trunk lid hinge is easy to pop off and back on.
On the driver side I removed the module below...
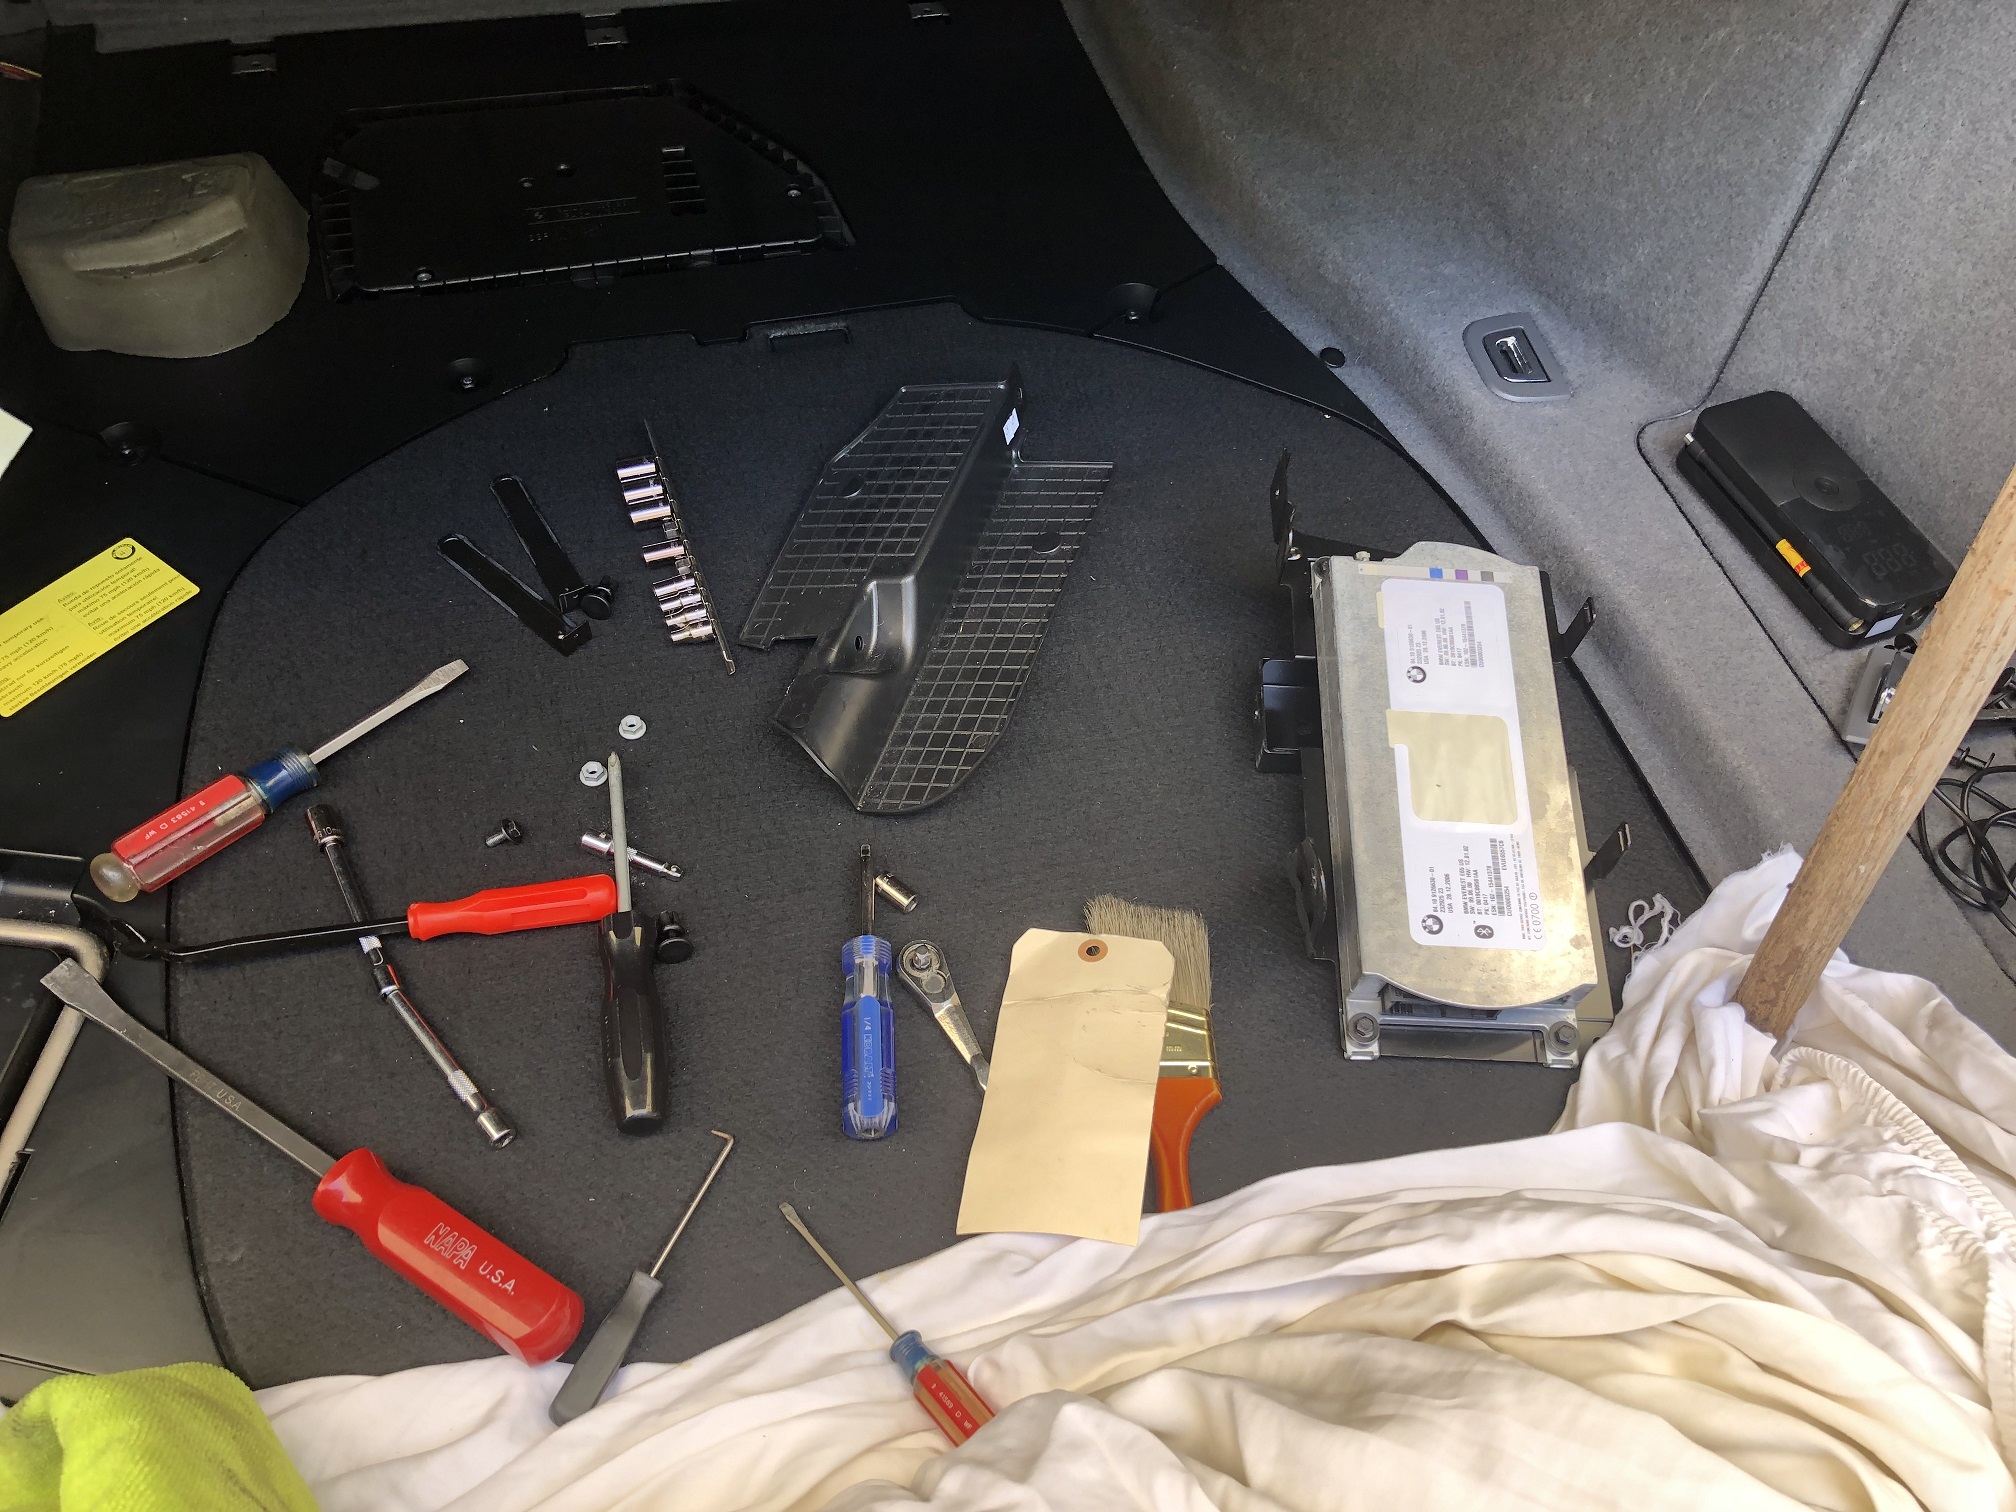
Then pulled the tabs out securing the Logic7 amp.
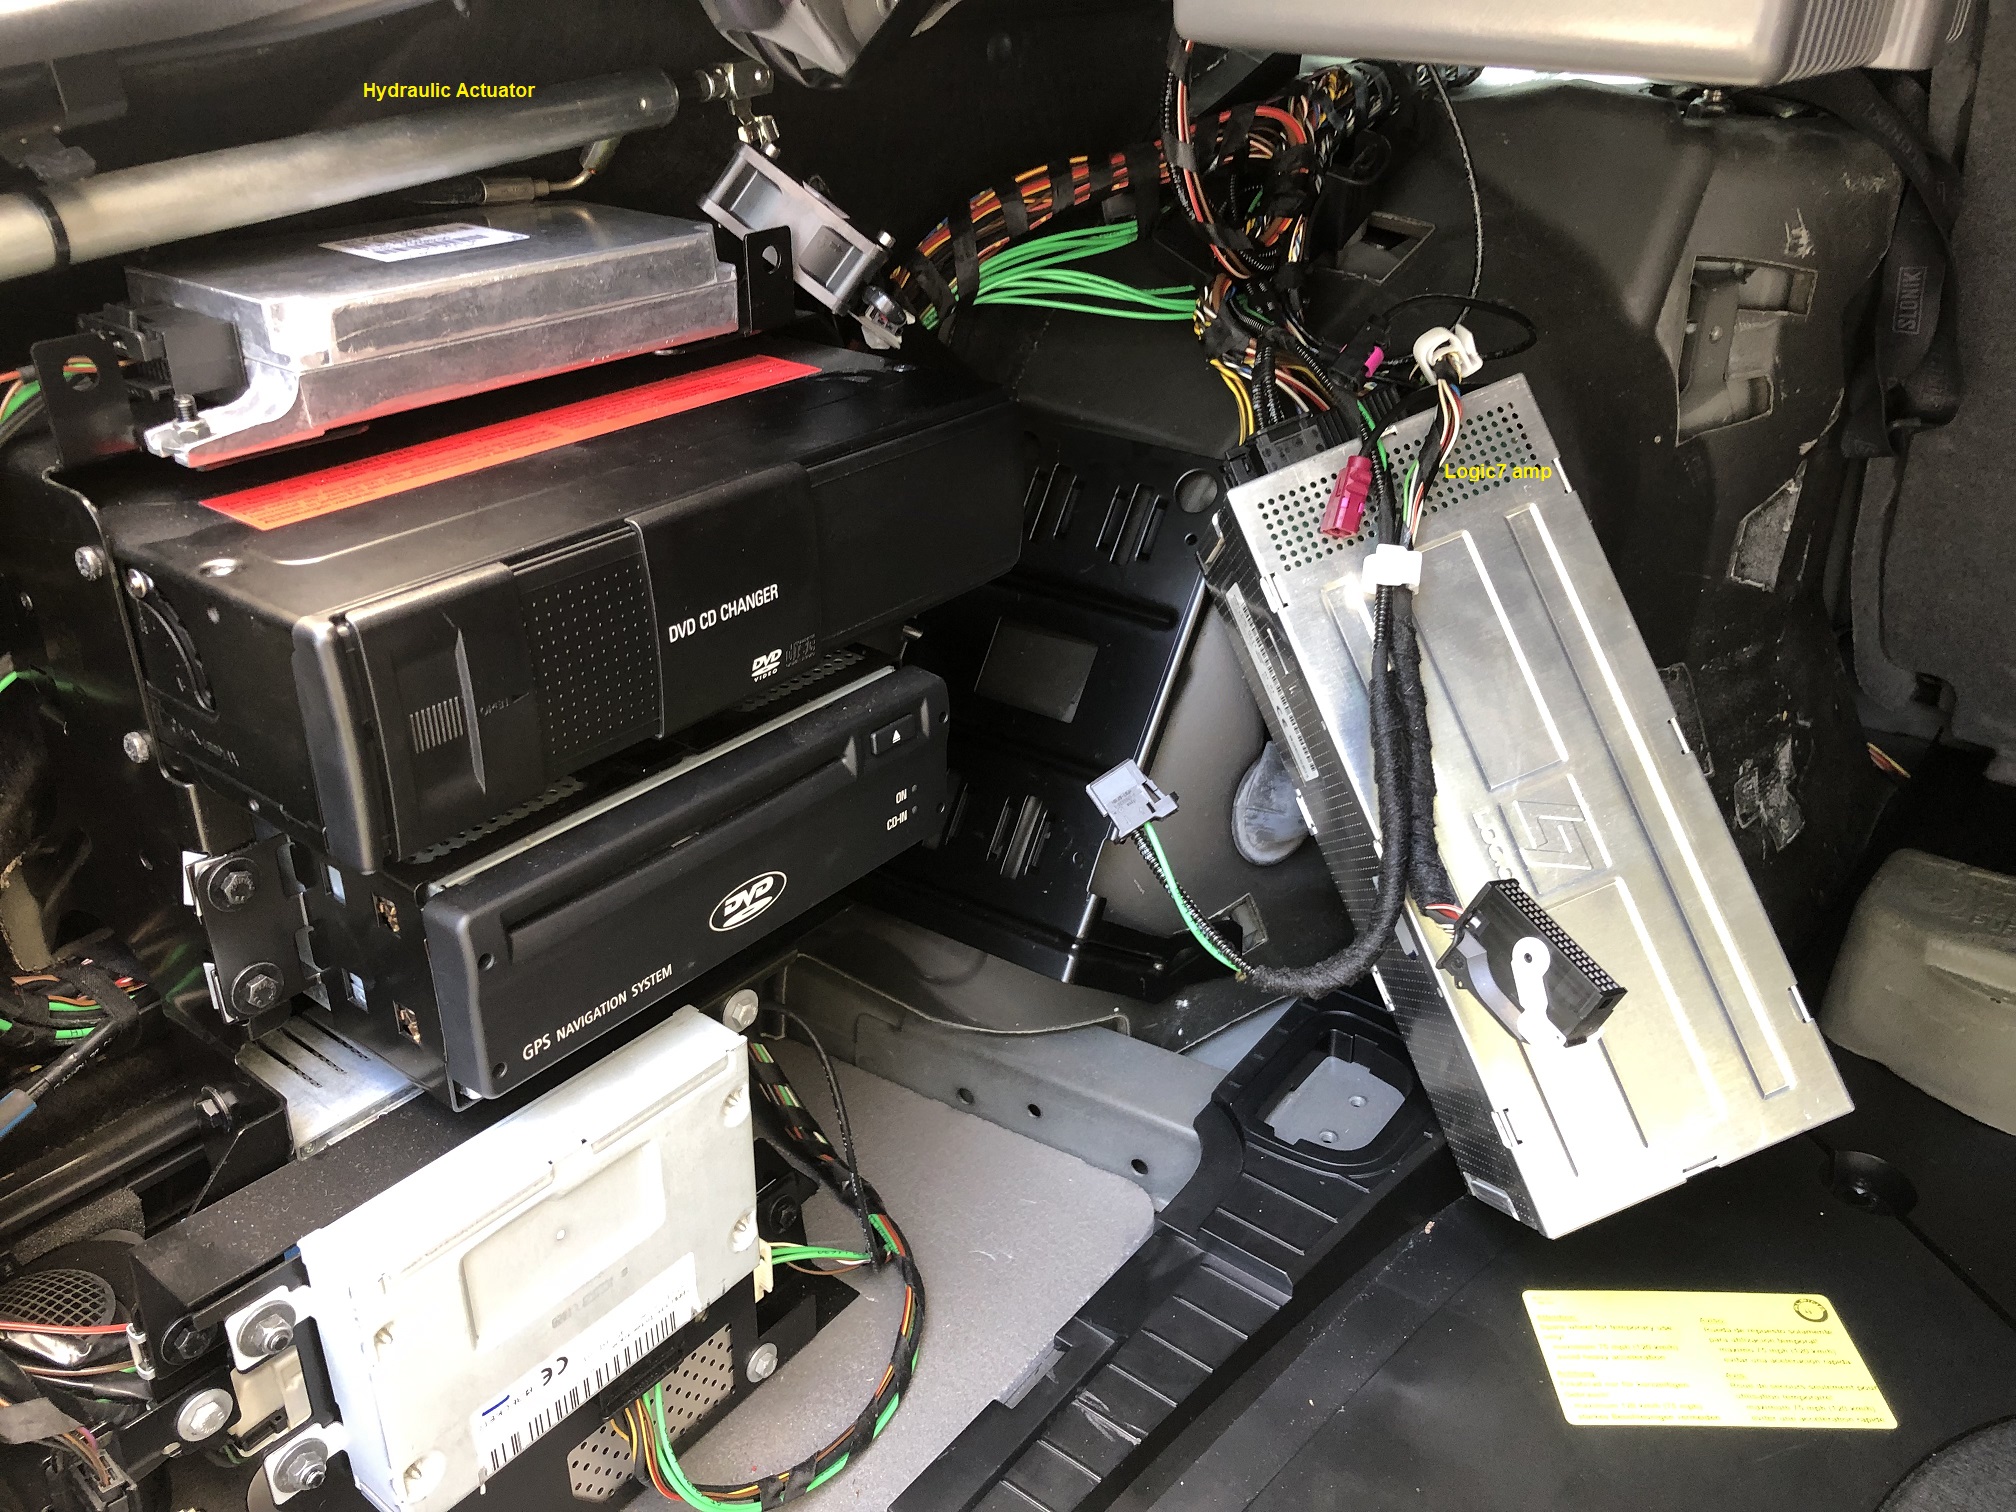
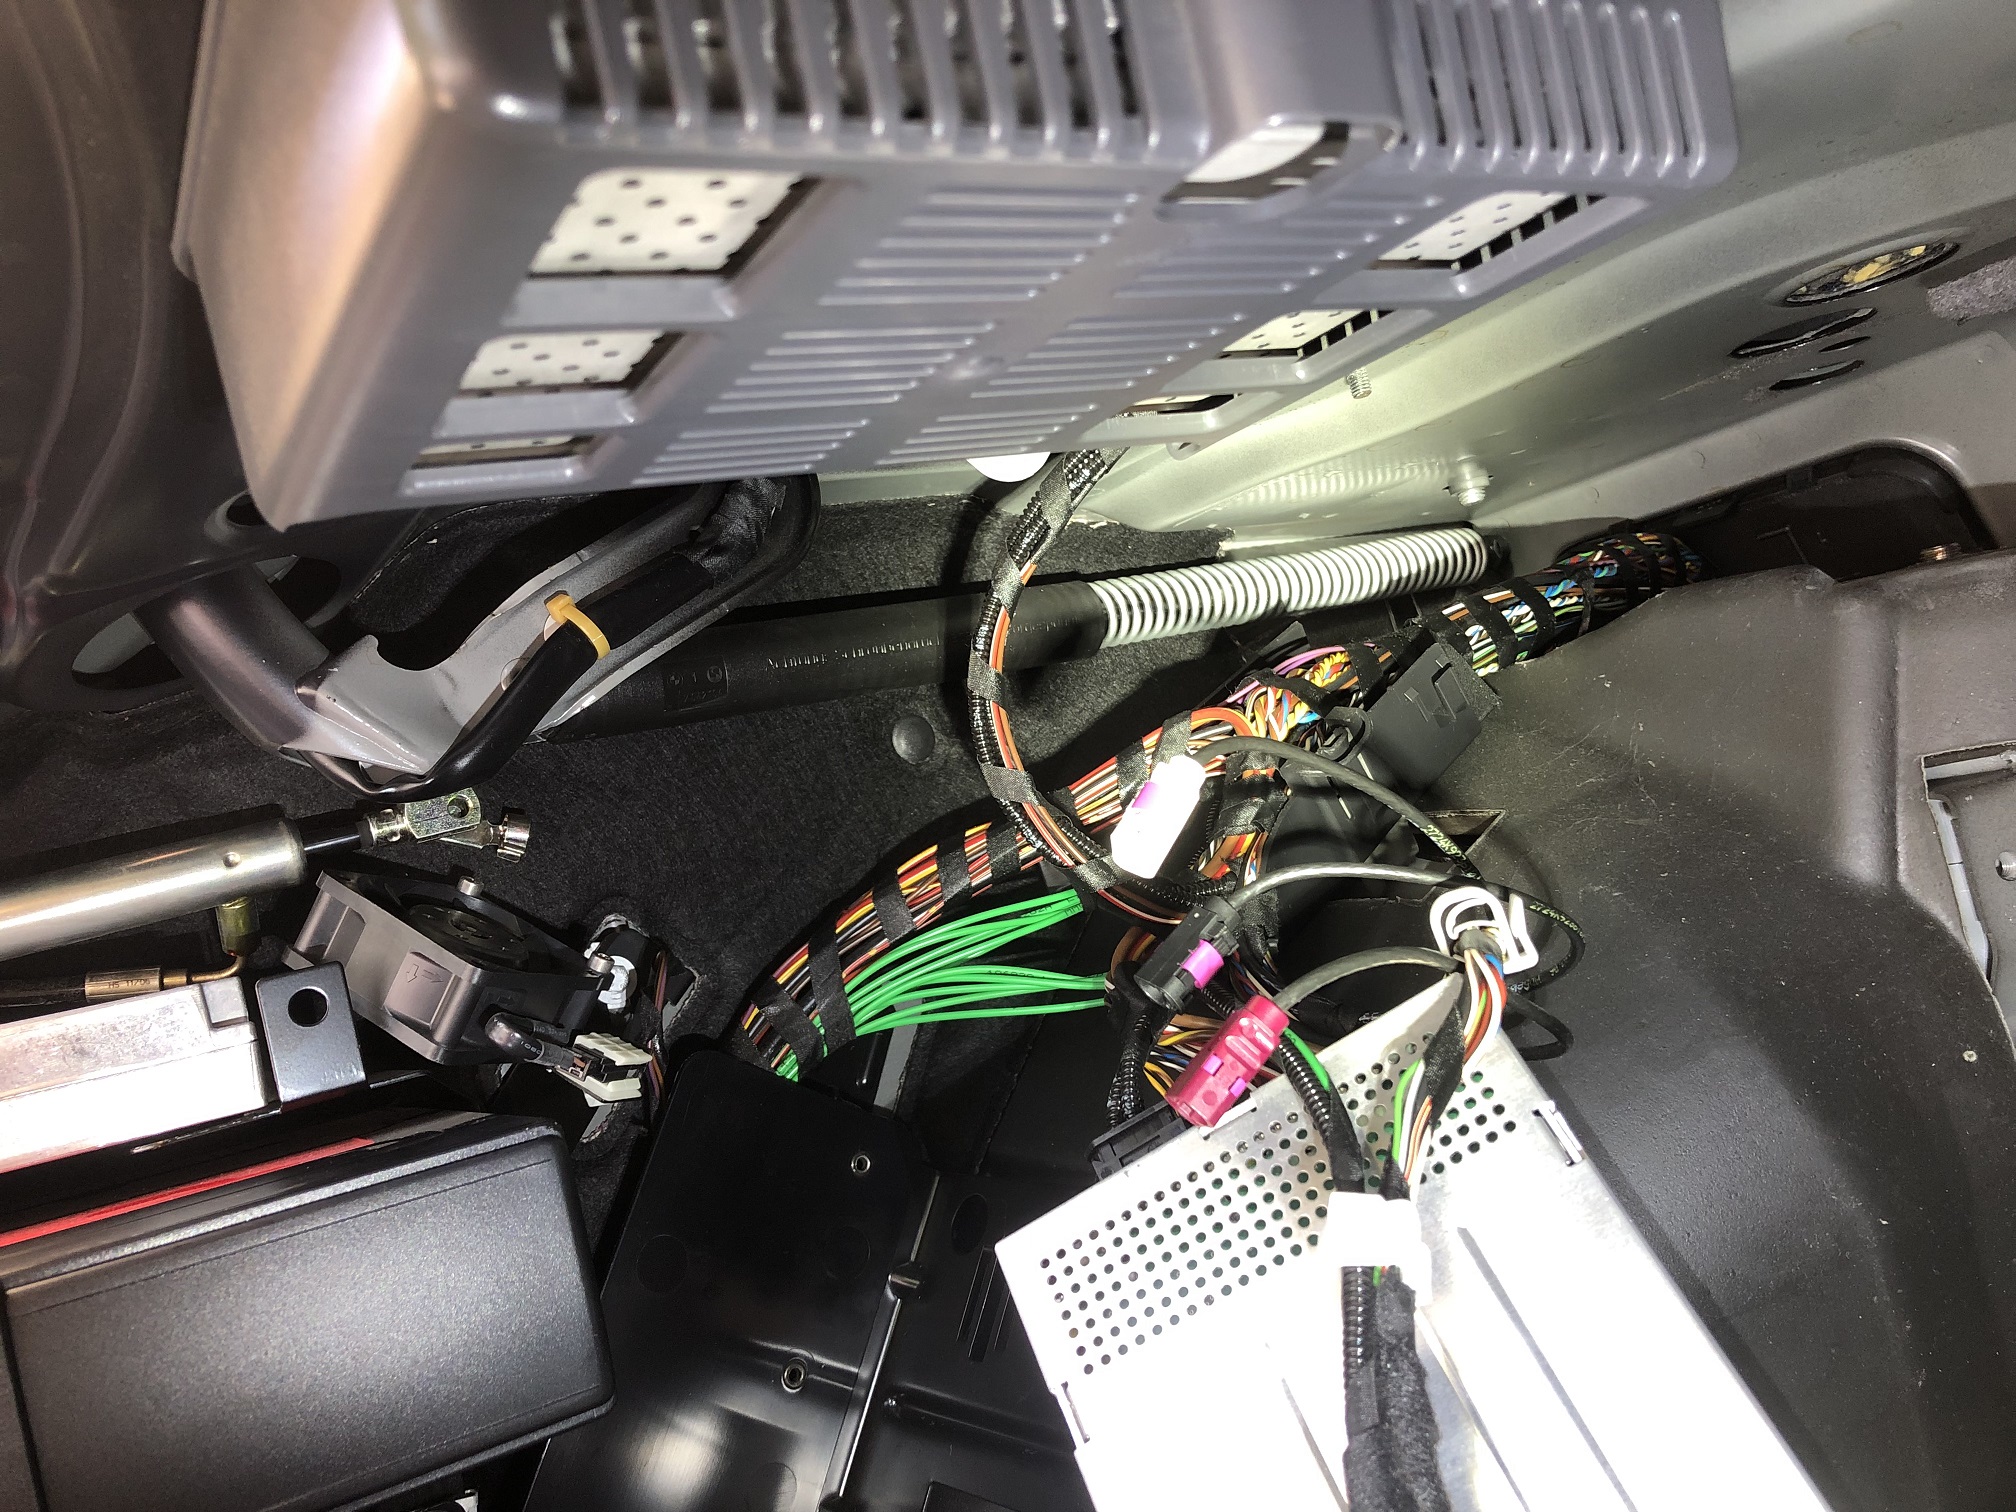
Then you can get tot he clip that secured the hydraulic actuator to the driver side trunk strut... unclip it and then pull it out to disengage as in pic below.
You can then remove/reinstall the driver side strut as per the passenger side.
These struts are only available from the dealer... I purchased online and paid about $75 ea in 2024. Both of mine were original to the car (about 16 yrs old) and trunk lid operation is much smoother and controlled now... and hopefully with less stress on the hydraulic actuator , it will give many more years leak free service.
Oil change March 2025
After 5 years of ownership I have put only 1500 miles on this car!
The removed oil filter and canister are clean as can be (no metal) ...
I filled her up with Mobil1 5W-30.
Transmission service #2 March 2025
Ever since purchasing this car it's had an occasional harsh gear shift when driving... it's not consistent, sometimes it will do it and other times is butter smooth.
I already changed the fluid and bridge seals shortly after buying the car but this did not resolve it so I decided to try rebuilding the valve body...
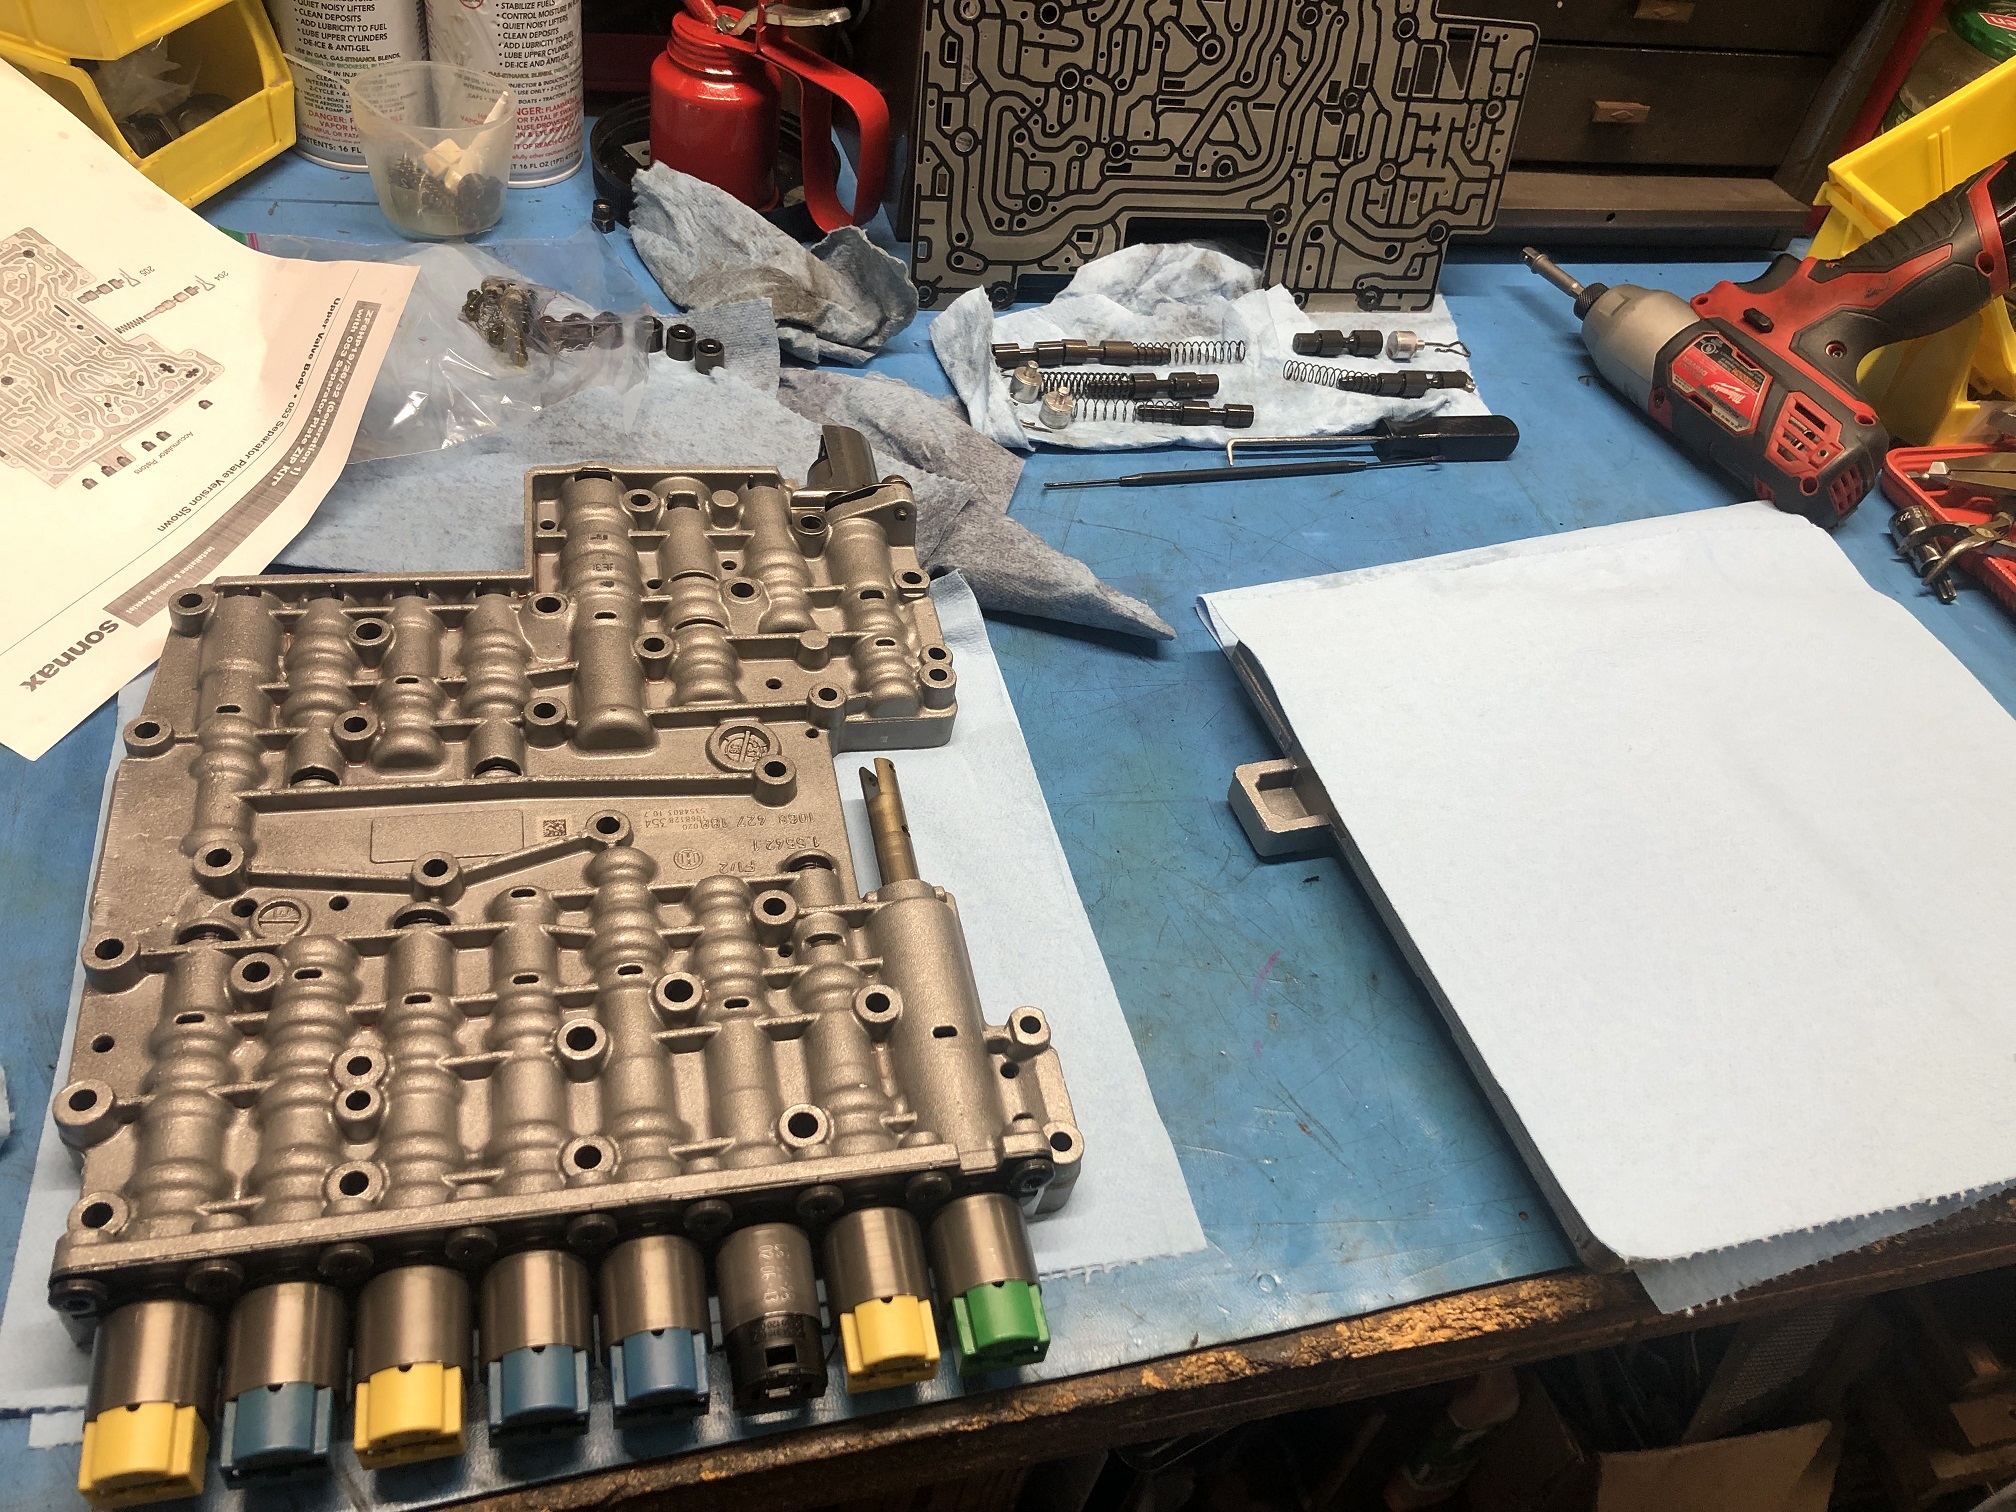
I installed new solenoids, dampers, plate (all ZF OEM) and a Sonnax ZIP kit.
Mechatronics unit separated from valve body...
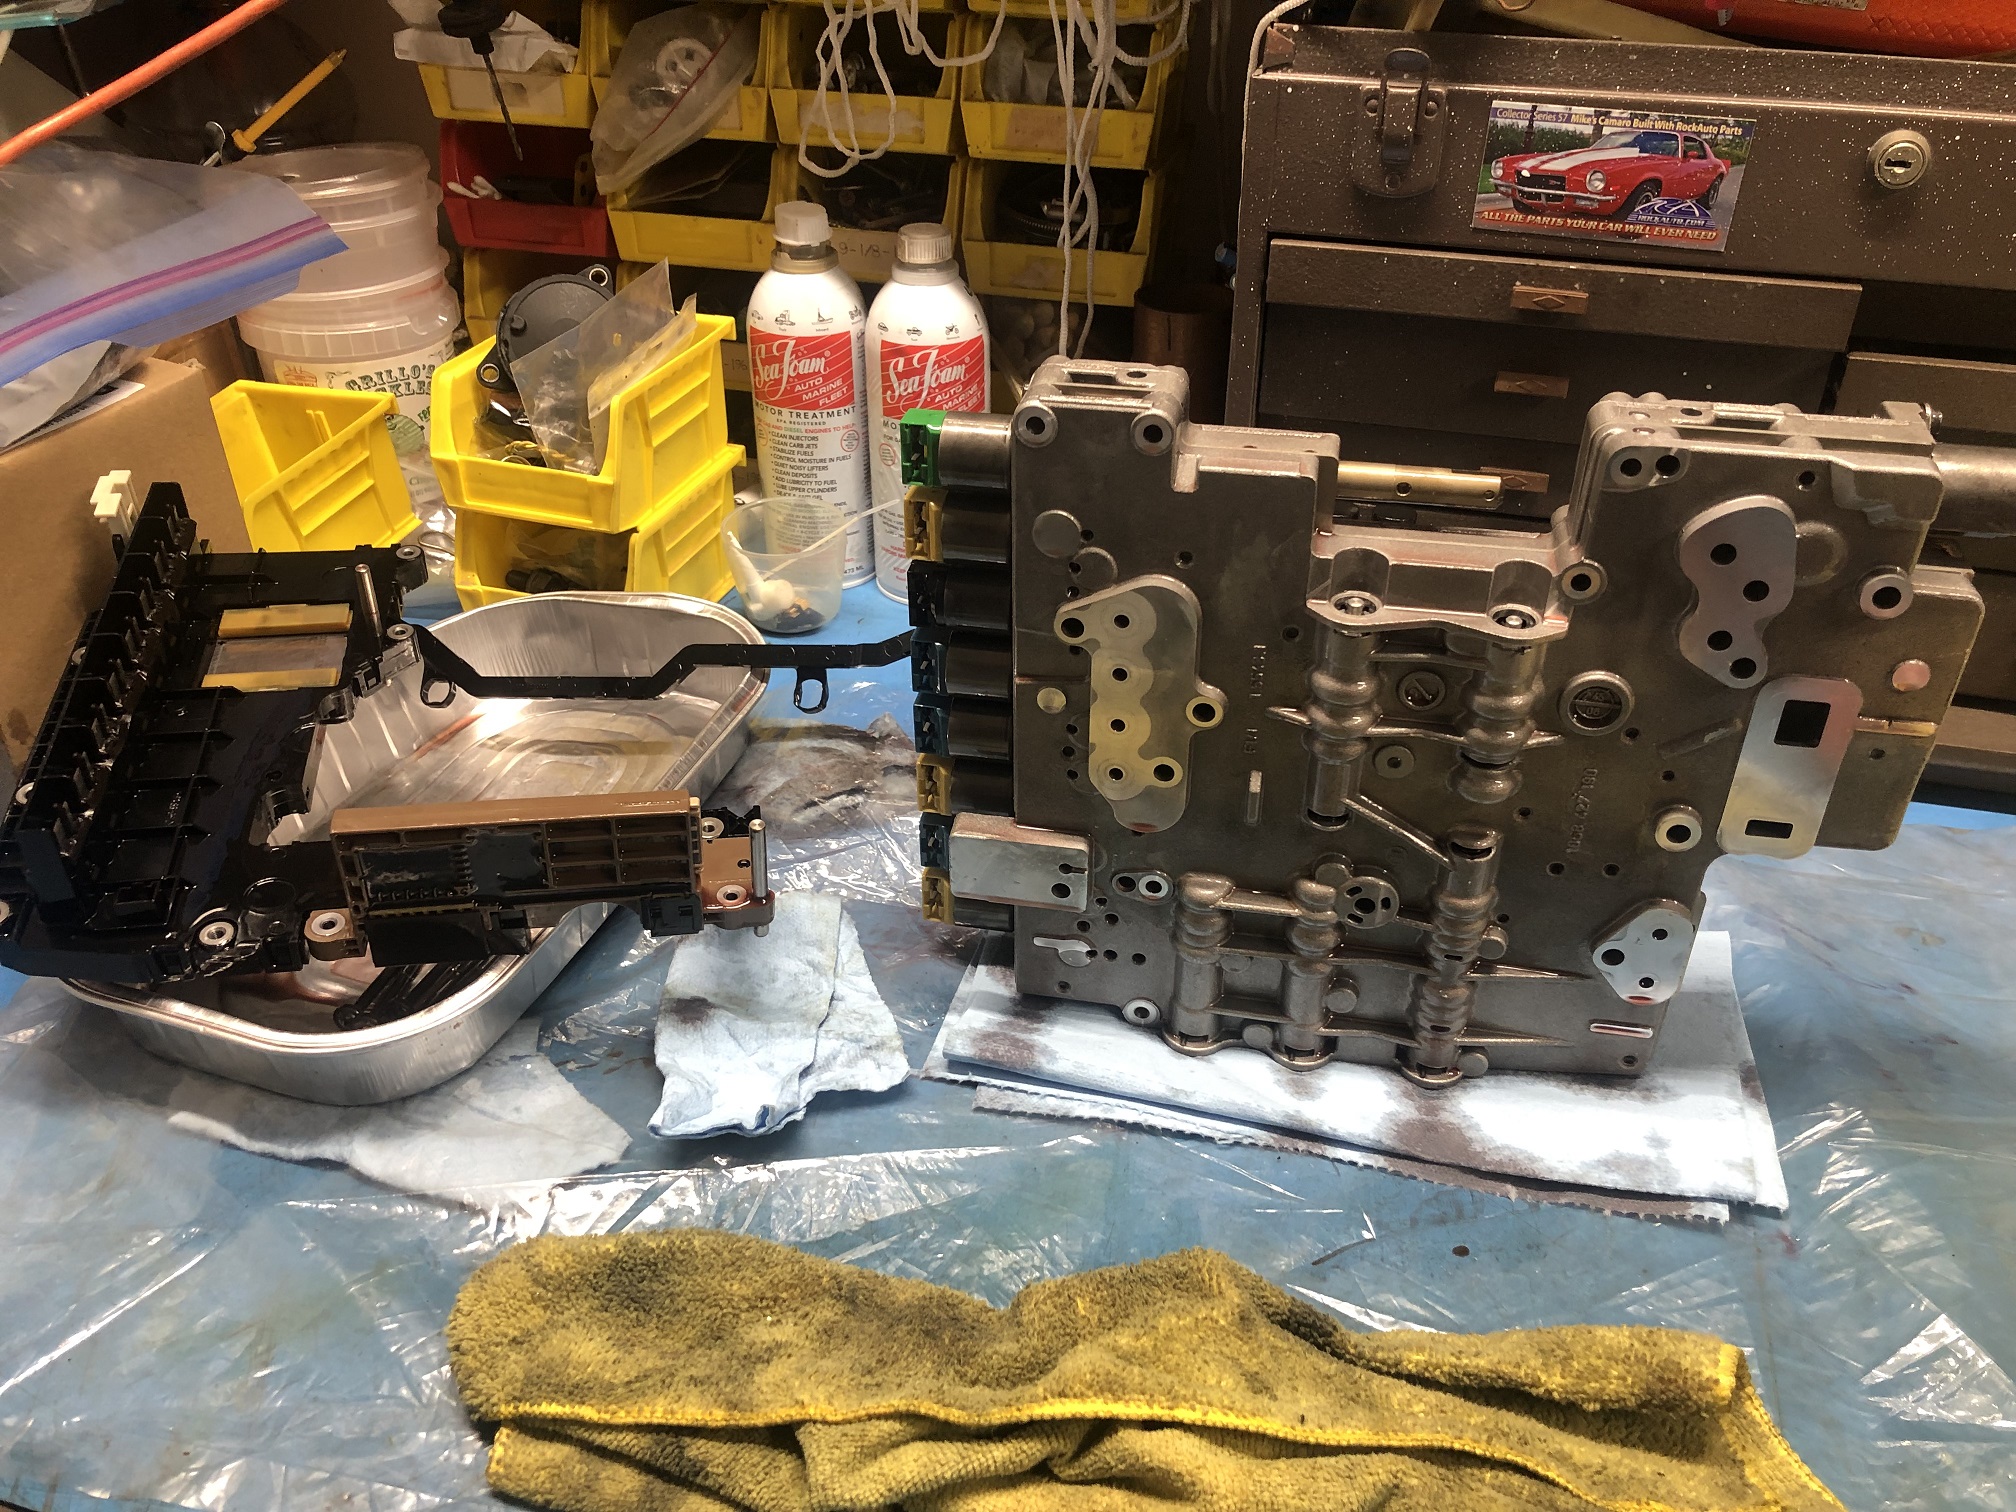
Valve body separated and plate removed. Nothing remarkable about any of it... all looks clean and perfect.
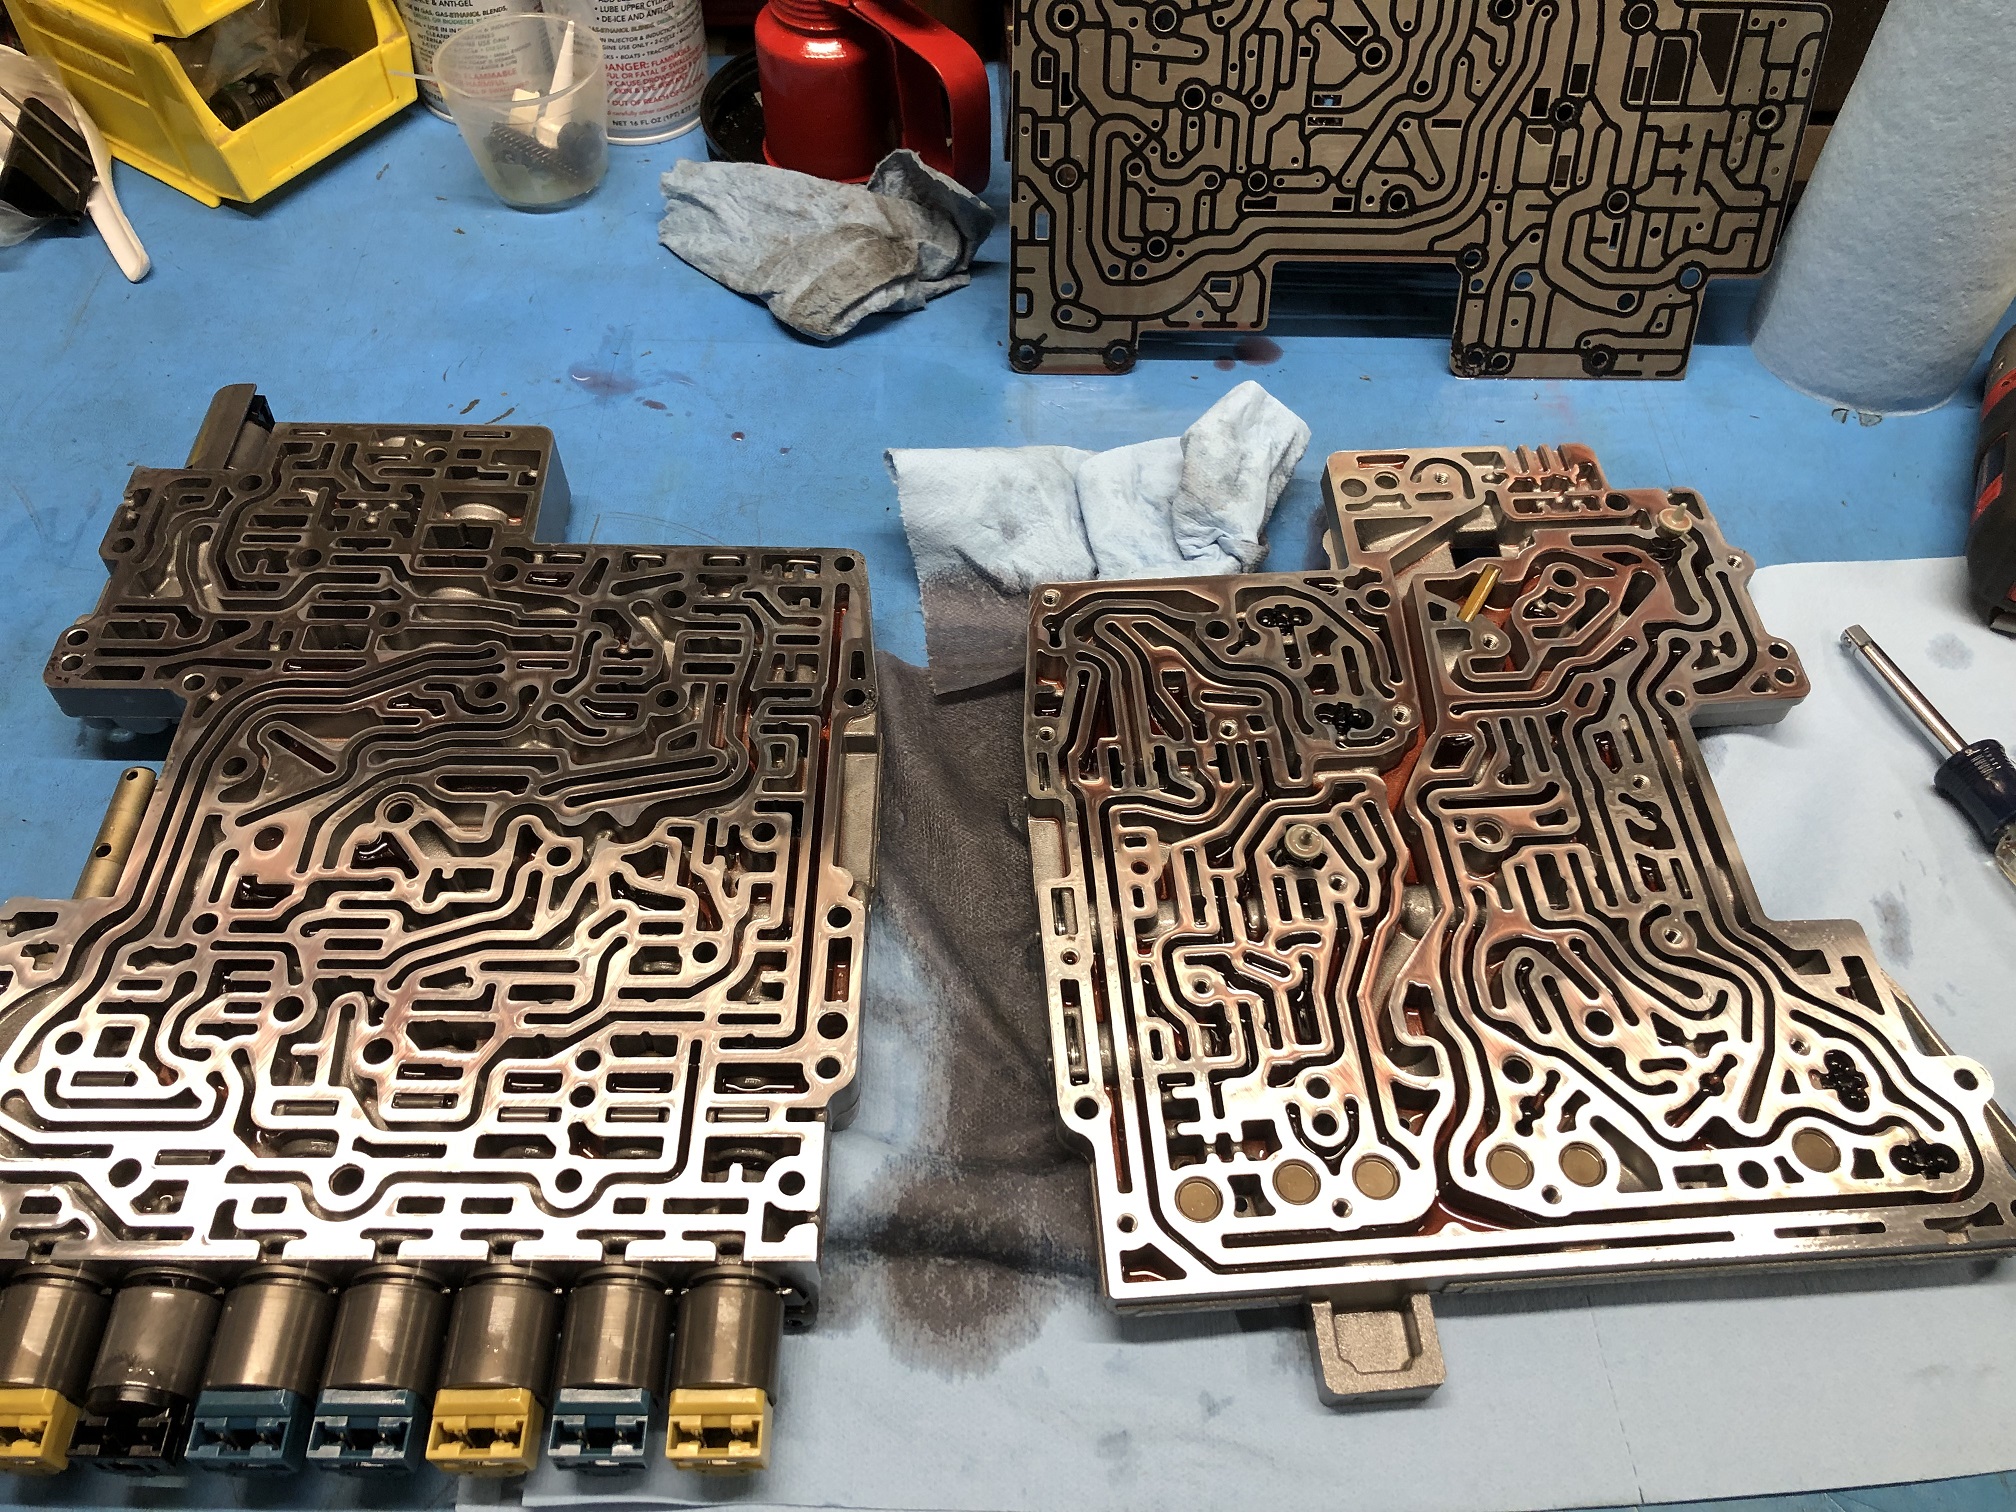
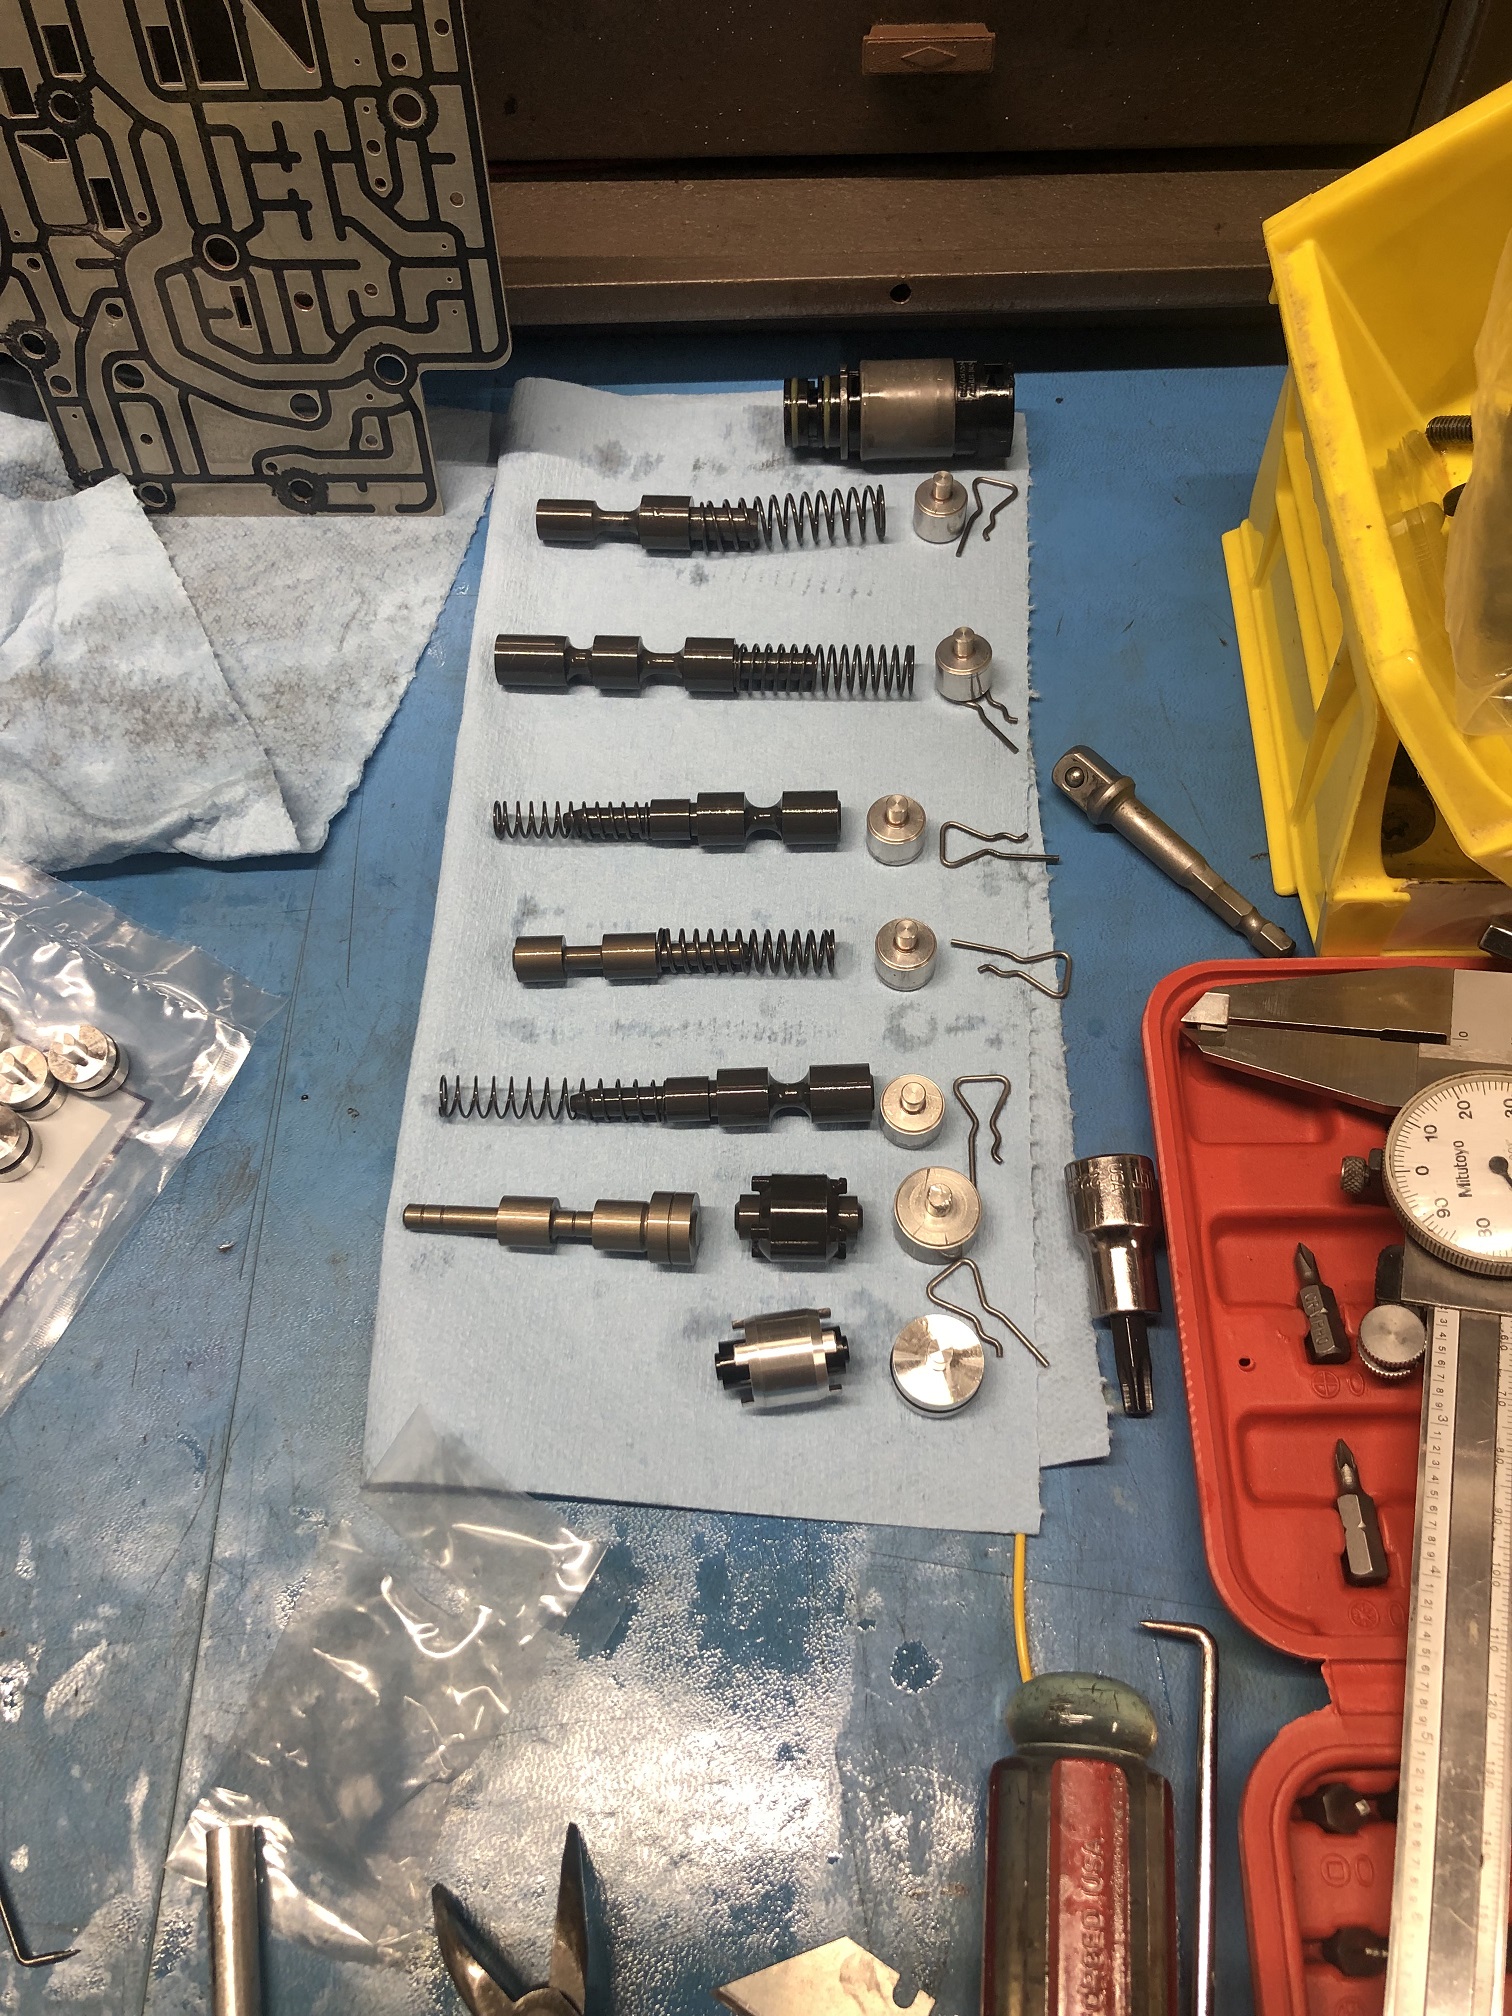
All the valves/springs/end caps were removed and cleaned. End caps replaced with the Sonnax parts (which have O-rings on them for a better seal).
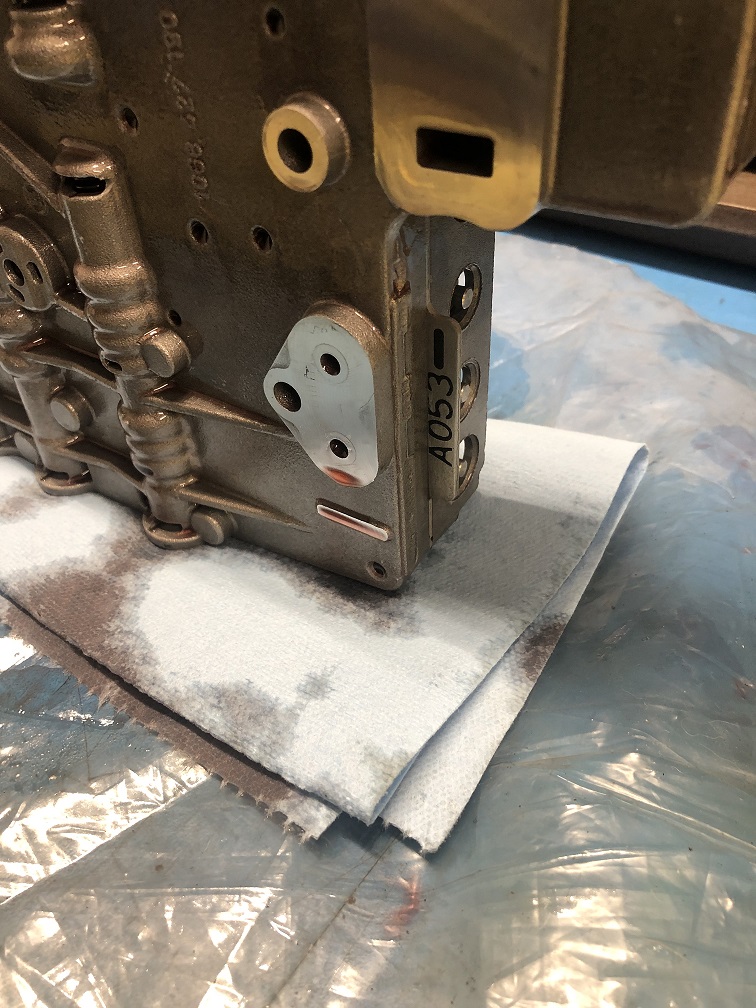
A053 plate in this transmission.
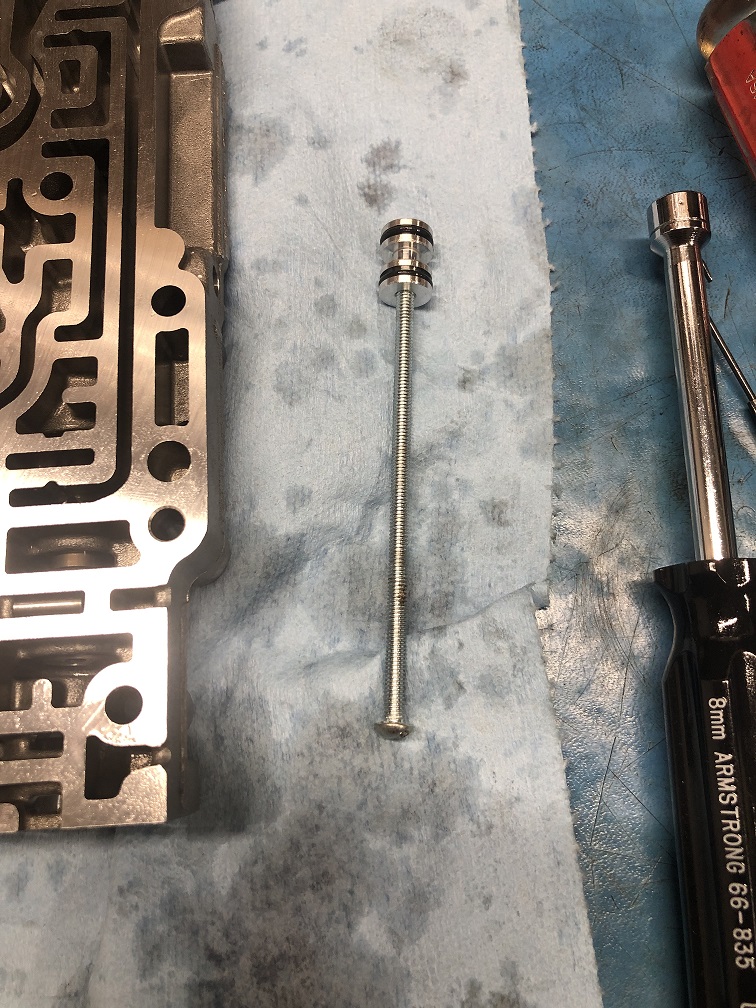
Zip kit is easy to install but you need a long screw to install/position these inner pieces...
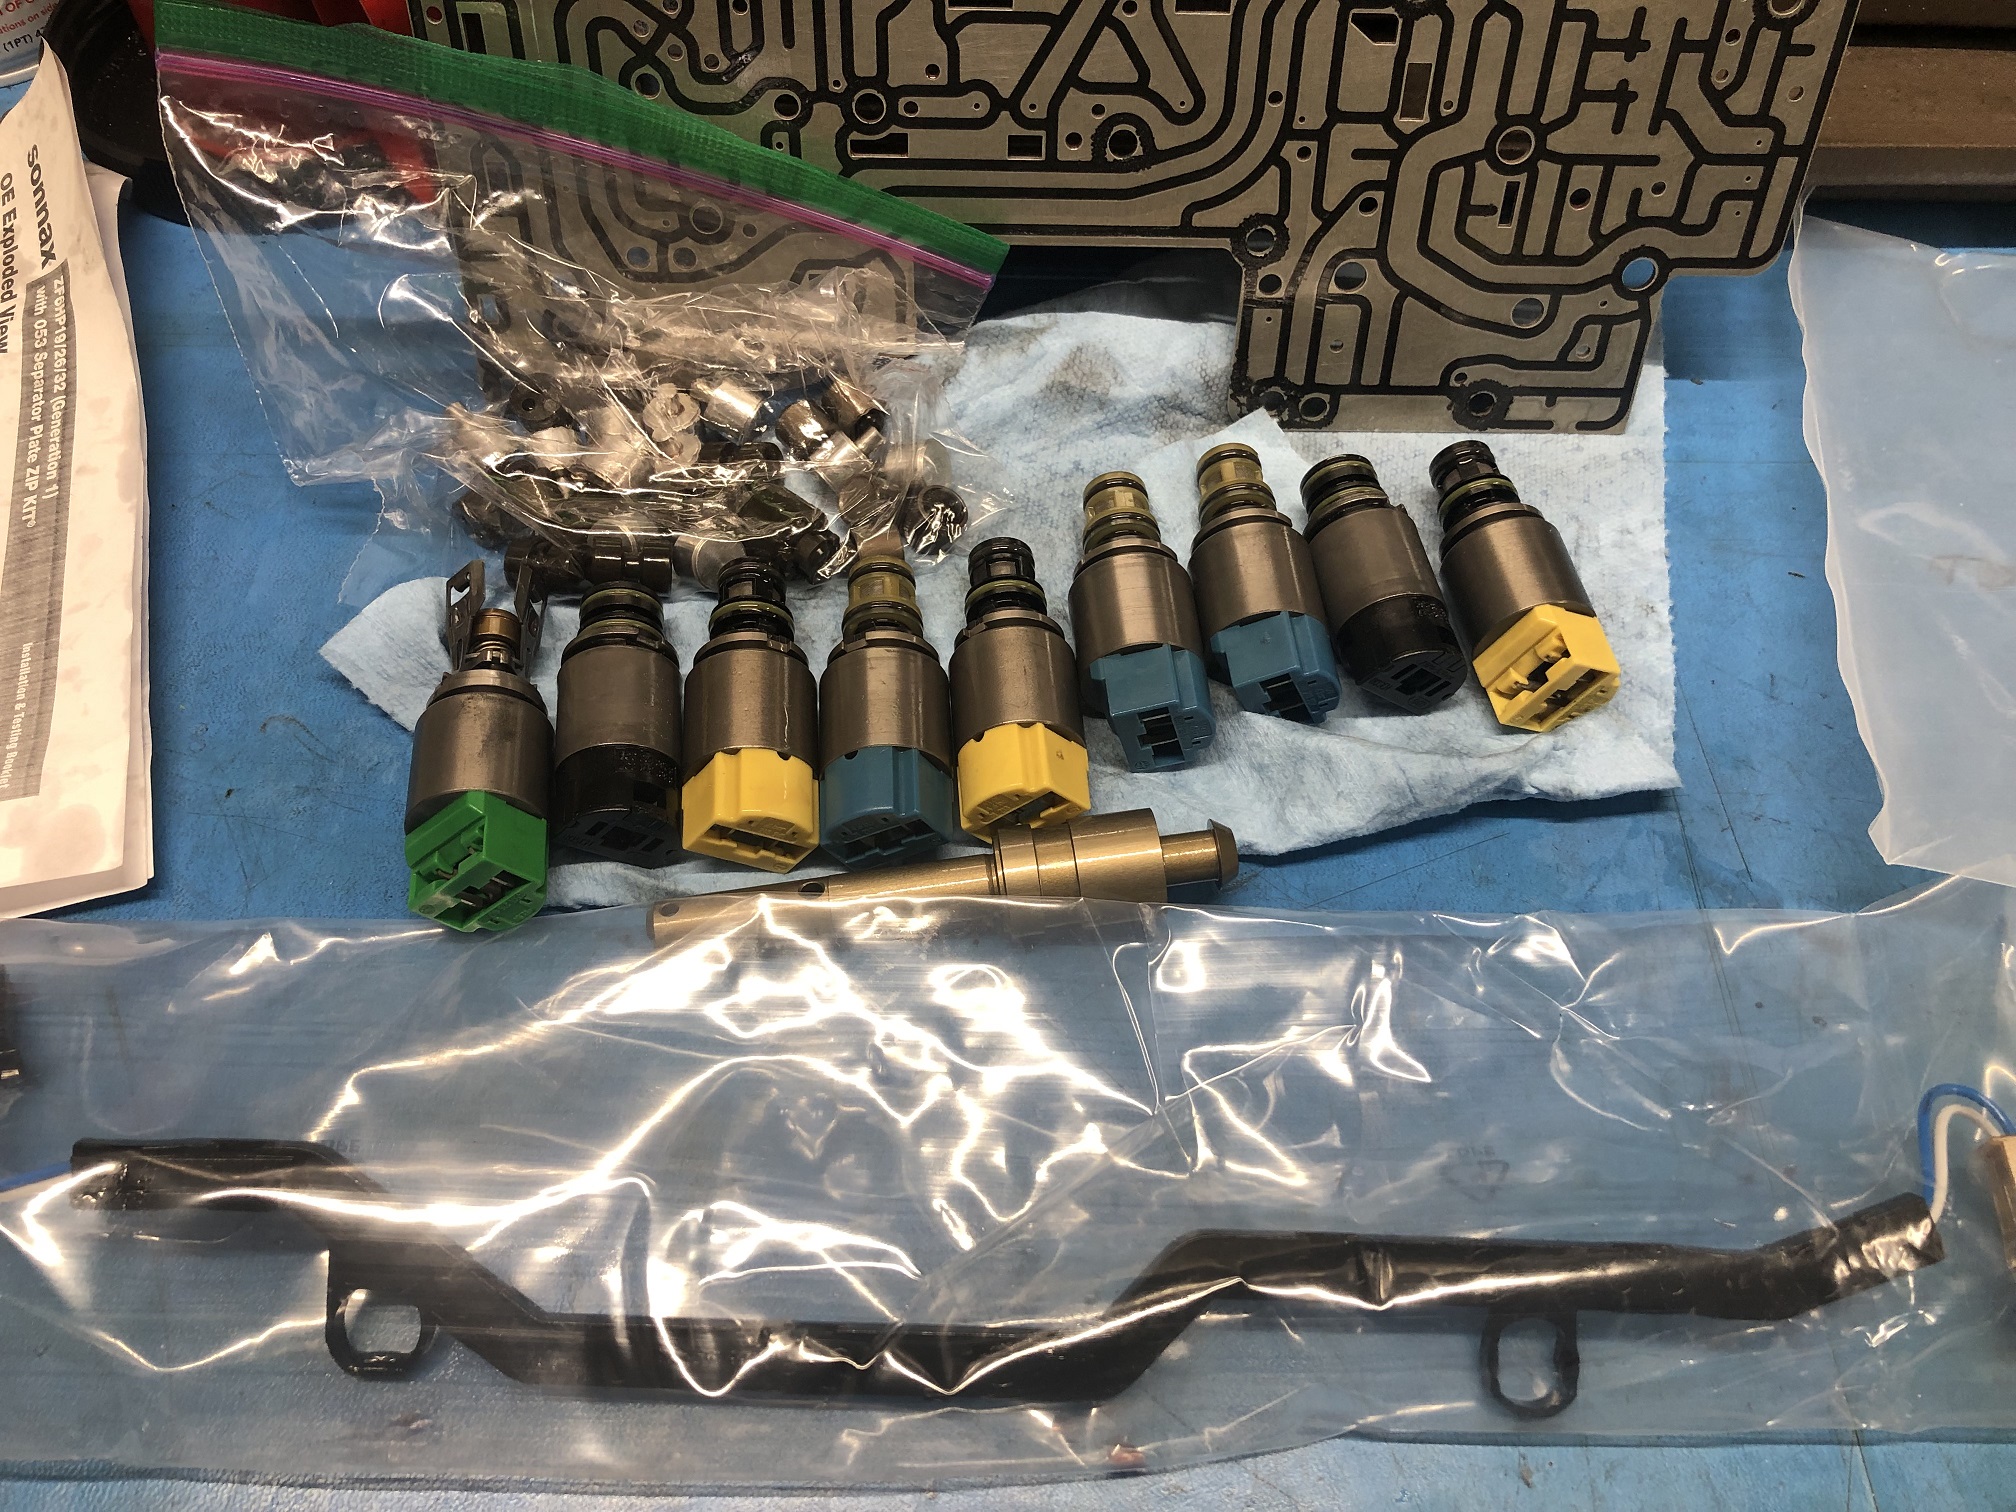
All the parts I replaced pictured below... Solenoids, plate, dampers, end plugs (Sonnax kit). This is a big job and you don't want to have to go in there again so best to change everything... but is a bit expensive (~ $640).
Some of the end plugs were a bit hard to remove... had to carefully scrape away any burs in the valve body. Everything was meticulously cleaned. Nothing looked particularly worn, even the dampers... I'm hoping maybe a sticky solenoid is the cause.
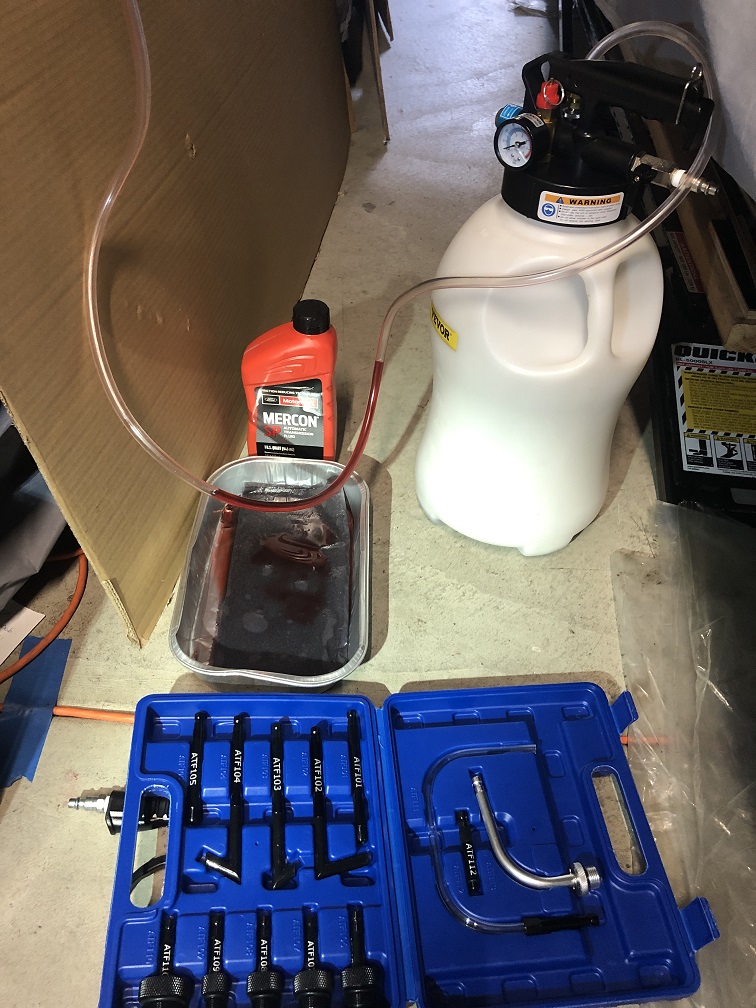
I refilled the transmission using ISTA to monitor temperature and reset adaptations. I used Mercon SP (re-branded ZF) fluid and this fluid pump made the fill job easy (requires an air compressor). Hose fitting screws right into the transmission fill hole.
As of 3/21/2025 I have only 1 remaining issue with this car... the audible clicker when the turn signals activate is not working (turn signals still work fine).