
1991 BMW 850i
page 4
the gas pedal was very sloppy and as expected the 2 plastic bushings that hold it in place had completely disintegrated.
Installing new ones was easy; unclip the spring where it wraps around the linkage and pull off the retainer to the right of the spring with a pair of pliers. You can then slide on the new bushings at the end where the spring was. Run them down and apply some silicone grease to the shaft. Re-attach the spring and retainer clip and the job is done!
You can see the brake booster above the gas pedal shaft.

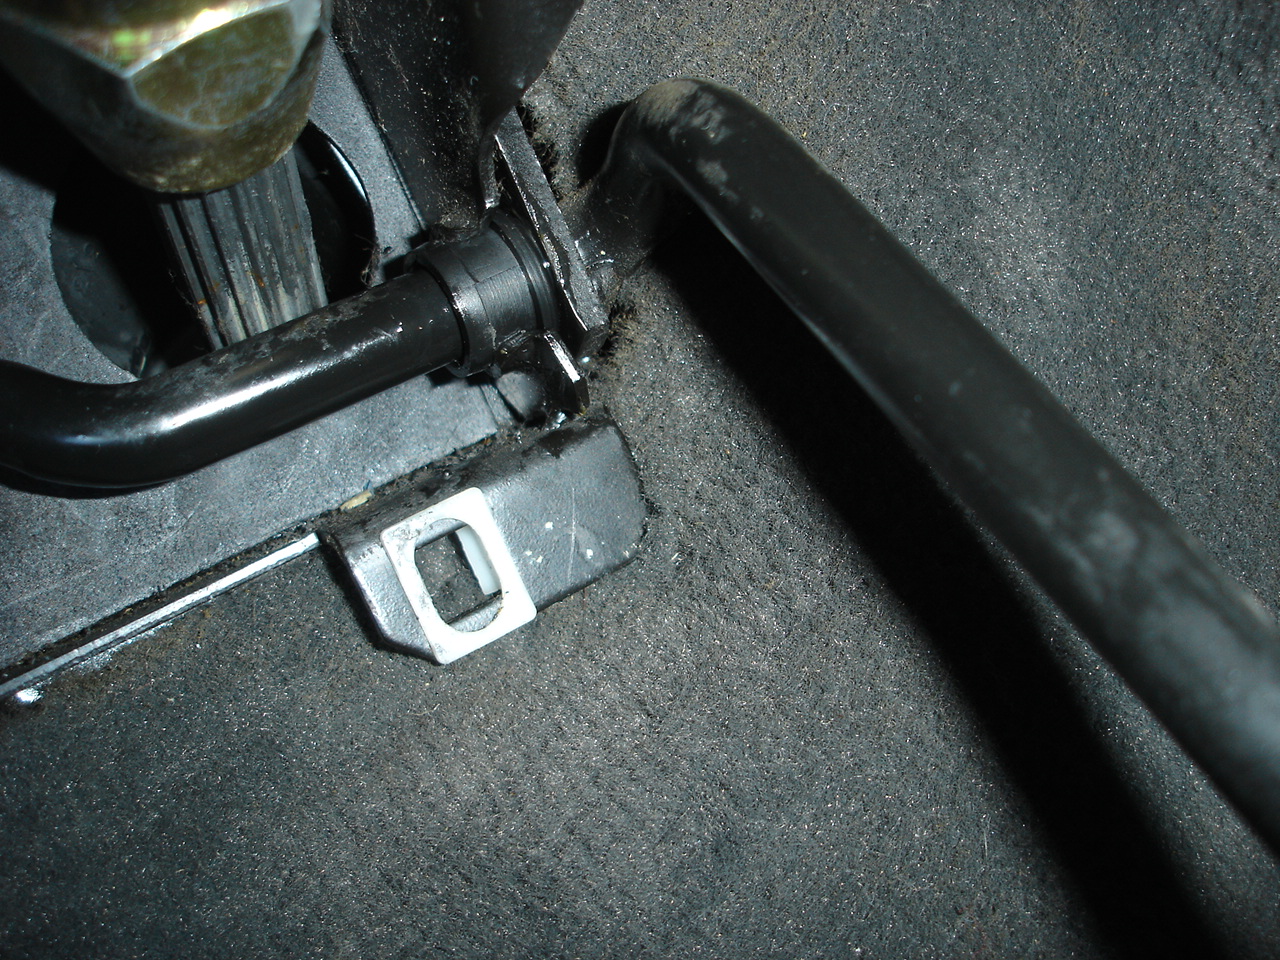

The speaker in the drivers foot-well looks to be in remarkable condition. I expected the foam to have disintegrated but it is fine.
7/19/15 Got the radio code from BMW (my daughter has a friend who works there) and it works great... the CD player in the trunk too!

When I drove the car home (1 1/2 yrs ago!) I could smell coolant which I now suspect is coming from the heater core. It is located behind the center console.
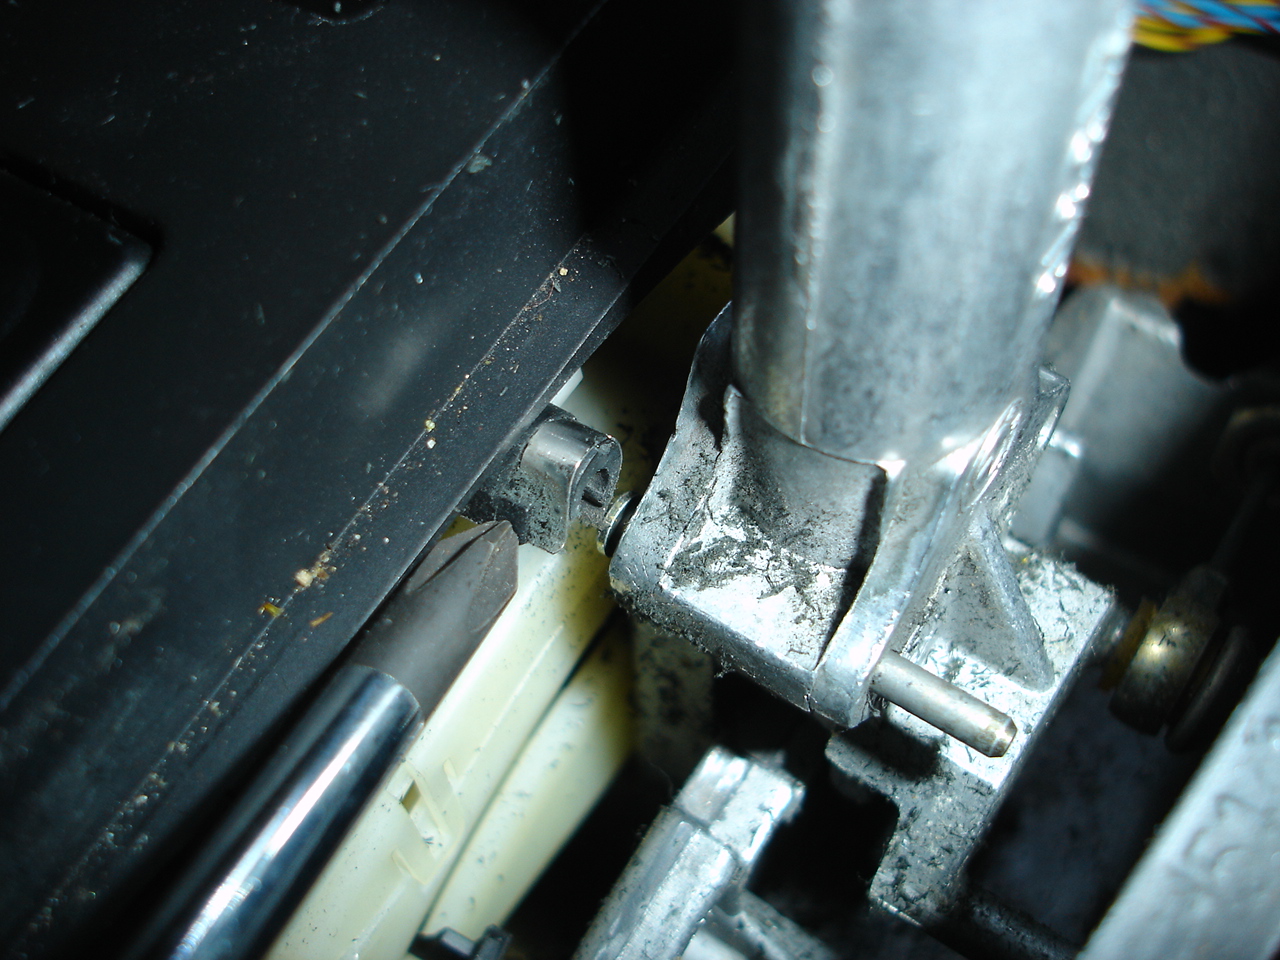
Removing the console is quite easy. First remove the radio, then MID, shift the gear shift lever to N and while pressing the lever pull up on it and it will pull off. Then pull up on the leather boot which simply snaps in place. Remove the screw on the front of the shift plate and unclip the gear indicator mechanism which attaches to a pin in the shift lever. This last step is often overlooked resulting in the gear indicator breaking
Pull up on the shift boot (it simply snaps in place). You can see the unsightly marks in the plastic on the console where I touched it during removal of the shift boot.
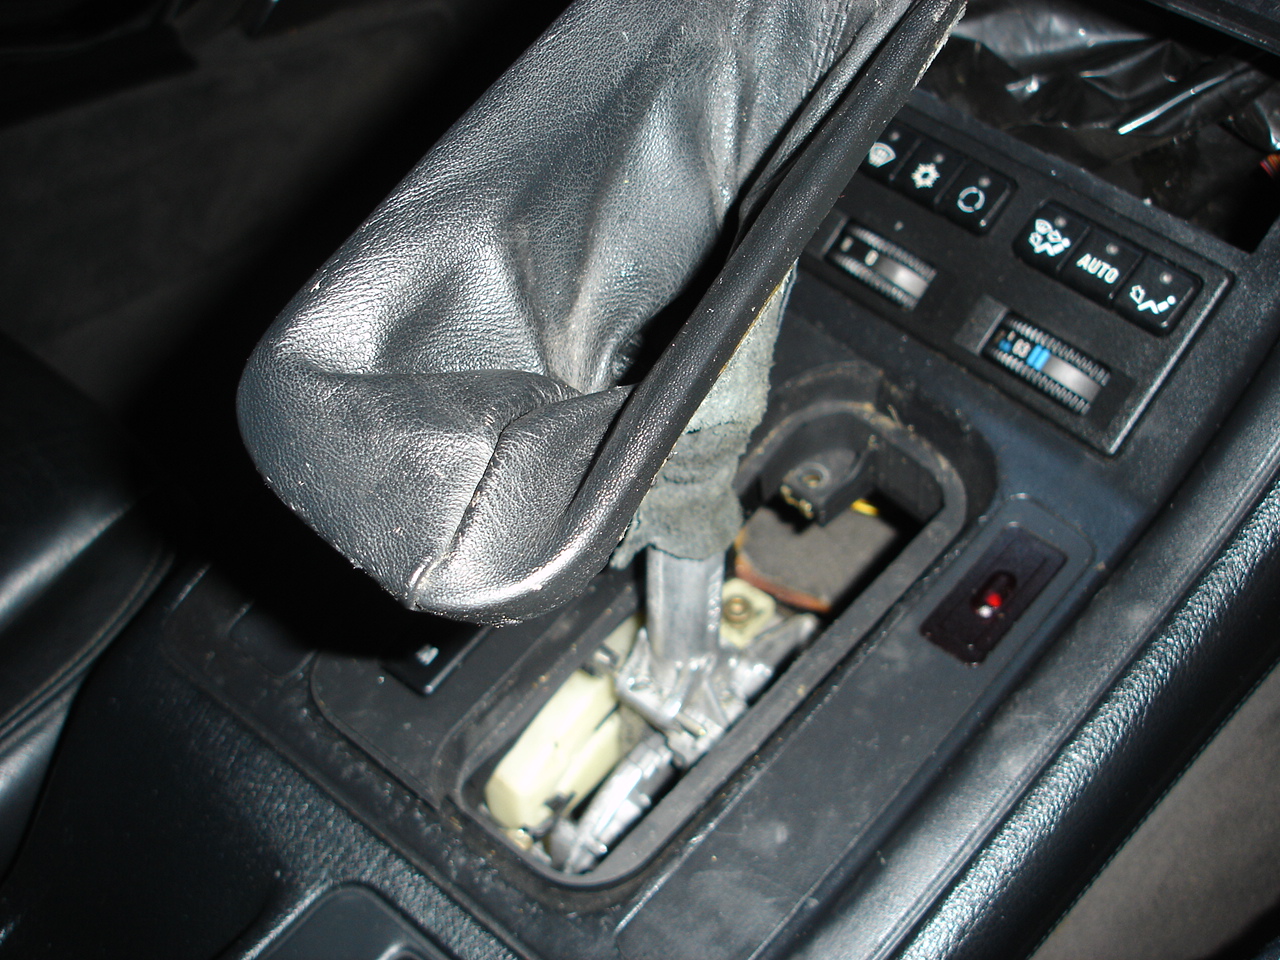
My center console and shift plate had become very unsightly with a sticky tar like finish which is caused by the soft touch coating BMW put on these plastic parts having broken down with age. Using hand cleaner and scrapers, I was able to remove it and it now looks 100% nicer.... no more black tar on my fingers when I touch it!

I finished it up with several applications of Mothers 'Back to Black' and some leather restorer for the shift boot. It turned out great!


This contraption (below) is the shift lever indicator. The large off white contraption has a bunch of light pipes with a bulb in the center and a rotating window that illuminates the appropriate light pipe and in turn the gear selected. Nowadays we'd simply use a few LED's!
You can se the black tar like residue on my fingers simply from holding this (now cleaned off).

The heater core is located behind this plastic cover. Web postings suggested it is possible to replace the heater core through this opening but I was unable....

Removing the small clips that hold the heater box cover in place can be tricky... a bent nail works good to release them!

But getting to them all requires removing the instrument cluster and just because I could, the center vent too.

I now have the heater cover loose but I still don't seem to have room to remove it. I'm almost to the point where it will be easier to remove the complete dash and then I will have all the access I need.
Later.... the only way I can see getting the heater cover off is to remove the dash and so that is what I did next.
This was a big job... had to lift the rear seats to remove the rear center arm rest, to remove the bolts securing rear of center console, remove the center console, A pillars, steering wheel and control stalks, glove box upper and lower and then finally out it comes!
This is the underside of the dash.

I was surprised to find the dash is dated May 1995, so was obviously replaced at some point.

The 2 center vent ducts have deformed a little - made from cheap thin plastic (a BMW trade mark). I will reinforce these to square them up and help ensure a good seal.

Here is what the inside of the car looks like now! All those wires are a bit intimidating but every connector is different so I don't expect any problems putting it back together.
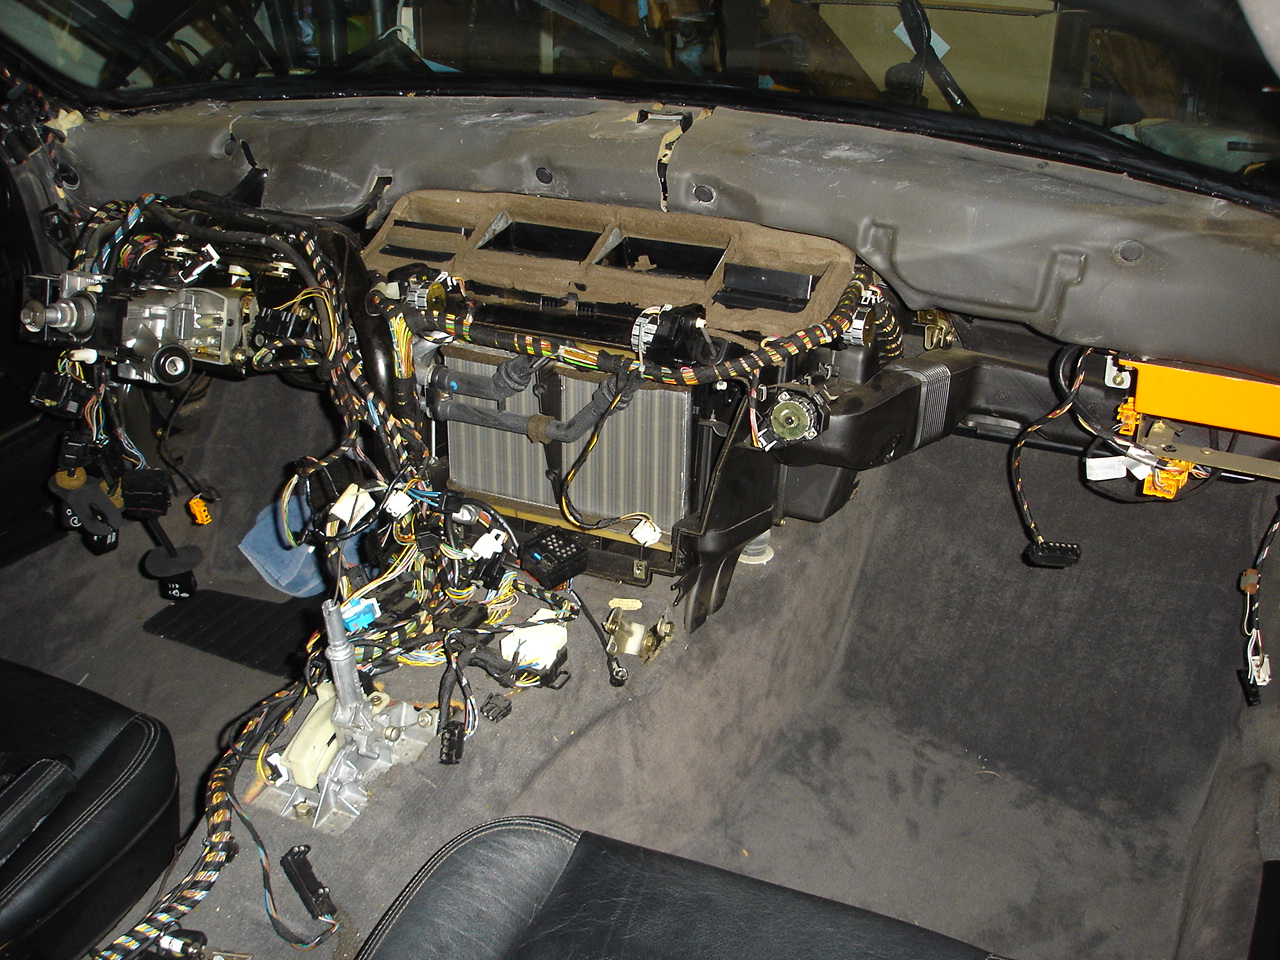
This foam has disintegrated and must be replaced - I ordered some from Home Depot that I will shape and glue together.

With the heater core cover removed I can now see the tell tale signs of a small leak (white coolant stains on black pipes).


Getting the aluminum heater core pipes off was a bitch.... I ended up cutting the black pipes so I could twist them individually and slowly back them out. Releasing the aluminum pipe from the heater core took a lot of persuasion.... in the end I drilled some holes in the plastic around the aluminum pipe and then used a hot soldering iron to melt away the plastic. Eventually it broke loose and I was able to remove it.

Glad to say the A/C core (behind the heater core) looks like new with no sign of any leaks.
The disintegrating foam was cleaned off.
I purchased a used stepper motor on ebay with cable and connector. I plan to build a simple driver circuit to test each of the stepper motors before replacing the dash.
The cloth tape on the wiring has a habit of undoing itself which makes the wiring look very messy. So I used my vintage electronics wire lacing skills and some teflon spiral wrap I had lying around in a few places. With everything neatly laced the wiring looks a lot nicer.

Here is a nice shot of the control modules under the driver side dash. The middle one is the GM module (I will be replacing the electrolytic capacitors which sometimes leak and cause all sorts of problems).


And here it is with new capacitors installed.

I removed the brake booster for rebuild and installed a new master cylinder as there looked to be some minor seepage at the seal.
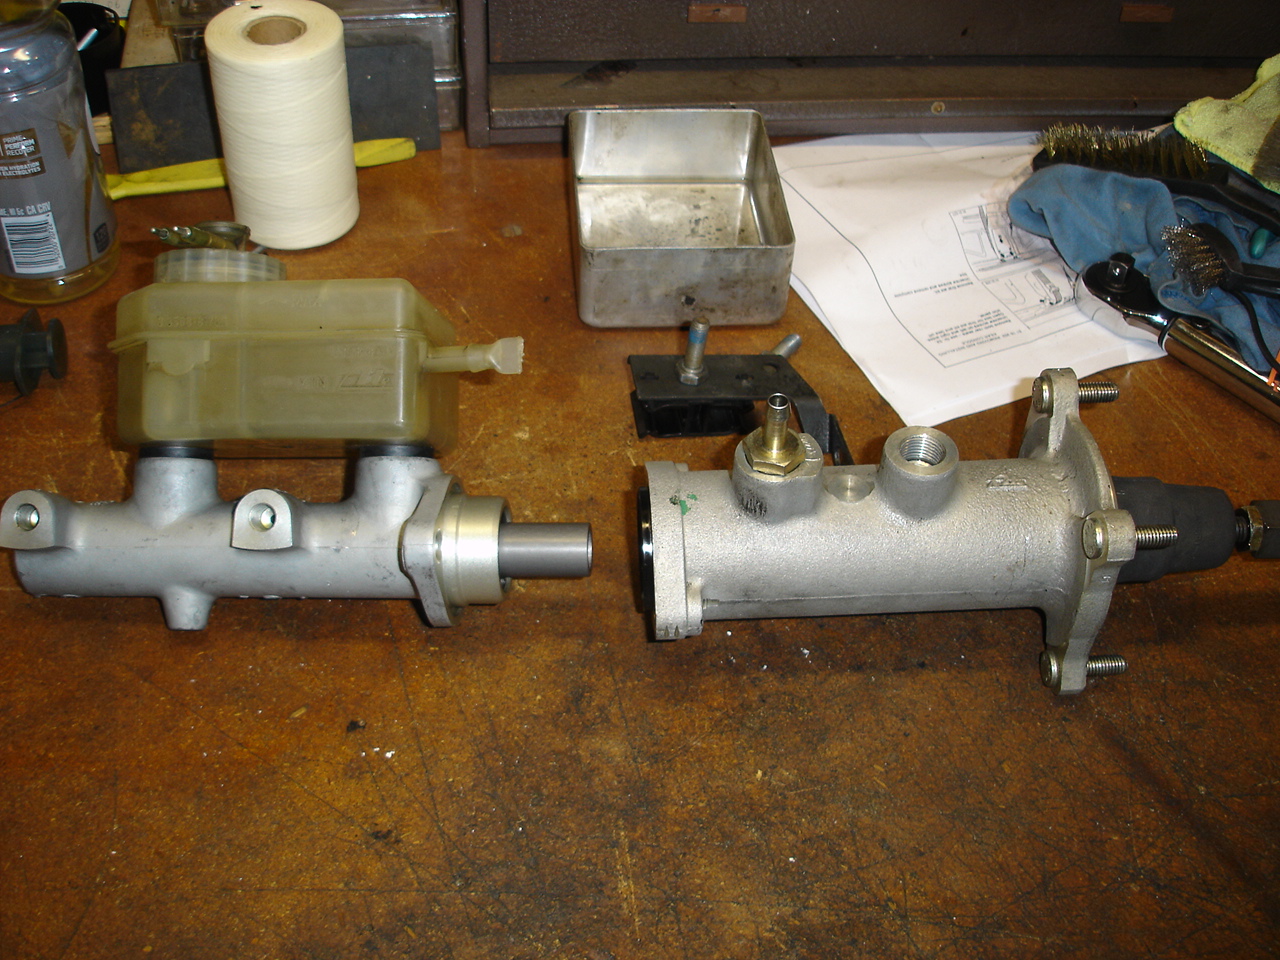
Signs of seepage past the master cylinder seal.


I used my drill press to release the spring in the booster using .


I replaced all the seals in the brake booster using a $100 kit supplied by Max Lumens. I replaced the plastic cone with an aluminum one that comes in the kit.


7/24/16 Update: Once I got the car back together I noticed the brake pedal was slow to return once pressed. I was pretty sure it was something to do with the booster but I did not investigate it until I learned of another person installing this kit who experienced the exact same thing. So I eventually removed the booster and investigated further. Despite Max Lumens claims that this kit includes identical seals to the original, the input shaft seal is nothing like the original! Unfortunately I damaged my original seal removing it, otherwise I would have re-installed it. The seal included in Max's kit is too small and grips the input shaft so tight it is slow to return. His seal appears to be nothing more than standard 16x24x5mm hydraulic seal sanded down to reduce its thickness. If you buy this kit I recommend you do not swap out the input shaft seal. I just assumed this was a well designed kit when I installed it - big mistake! Mr. Lumens never responded to my attempts to contact him. I eventually sourced a good used original seal and all is back to normal.
The rebuild process is straightforward but the new seal on the input side is a very tight fit and takes some work to get it into position.... and it is also a tight fit on the shaft that passes through it. In the re-assembly process I found it impossible to push the shaft past this seal from the inside as you are pushing against the seal lips (they point in the wrong direction). So I made a mandrel 0.65" dia and pushed this in to the seal from the outside. I then pushed the shaft up against this mandrel from the inside and was then able to push the two through the seal together with a quick push.

Here is the rebuilt booster with new master cylinder attached. Note the home made gasket on the mounting studs which was missing on my car.

8/23/15
The rebuilt brake booster and new master cylinder are now installed.
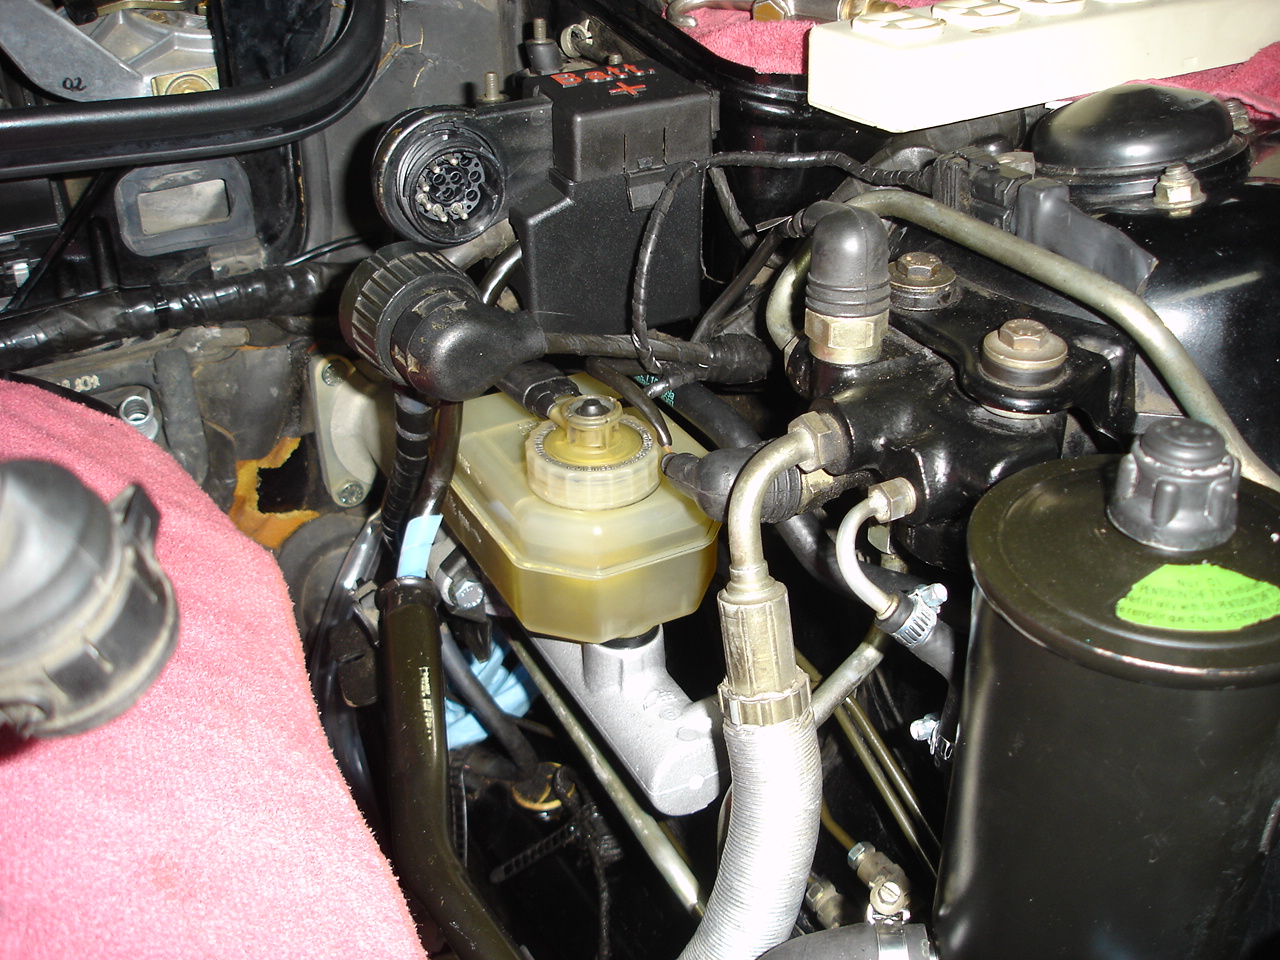
I also installed the power steering reservoir (pentosin canister) and refilled it.
I bled all 4 brakes with the aid of a special brake reservoir cap that has an air fitting on it. 15 PSI is applied and each caliper bled - remembering to top up the reservoir after bleeding each caliper. It is a simple method that works real well. The old brake fluid was definitely ready to be changed.
Getting back to the heater core install...... I built up this simple stepper motor driver using some junk parts I had lying around. The stepper motor is an Ebay purchase and came with the connector! My plan was to make sure all the flaps in the HVAC are working correctly before installing the heater core.

This flap was opened first.

Then I was able to see and control the heat/cool flapper inside the heater core.

And this flapper sends heat/cool air to the passengers feet

Getting to all the motors on the drivers side is a pain and since everything I tested is working perfectly, I did not bother trying to test the motors that were not easily accessible.
With this out of the way I installed the new heater core and pipes.

Getting the heater core into position and that first pipe on is not easy but is easier if you release the nylon clamp on the pipes here (accessible from the drivers foot well).

Got the heater core cover back in place and most of the wiring in position.

I received the foam I ordered from Home Depot and started fabricating the foam gasket for the vent pipes in the dash. I ended up trimming this down quite a bit especially at the front.

I used some of the leftovers to re-trim the center vent. This foam is a very low density foam that is very close to the original. Most of the adhesive strip foam you find at Home improvement stores has a much higher density and is not well suited for this application.

9/6/15
The interior is almost back together now. It took quite a bit of fiddling to get everything to fit to my satisfaction.
